

How to Give Your Chatbot a Personality
Conversational interfaces have brought forth a change in User Experience unlike anything we’ve seen for a long time. Products are now able to talk back to customers during their sales journey and businesses have been given the ability to inject various brand personas into this process. However, introducing a chatbot into a business environment can present challenges unless it is carefully designed. This is why when you begin to create a chatbot for your business, it’ll be important to hone into the feature of its personality.
Ultimately, every bot has a voice; your chatbot represents your company on a personal level to the user, engaging in a one-to-one conversation. Therefore, by creating a personality for your bot, you’ll be creating a highly enjoyable experience for your users instead of a robotic, impersonal one.
A chatbot is a robot but does not need to behave like one
When a chatbot is designed with a personality in mind, all business functions prosper. This is because a personality allows you to understand the chatbot's end goal better and how it'll communicate. One of biggest benefits of a chatbot for businesses is an increase in user engagement. Click-through rates, sales and other KPIs can all reach new achievements when a chatbot is made into something fun for customers to interact with.
Think of it this way: a chatbot without a personality is just like C-3PO without all his quirks - just a tool to consume and/or broadcast information.
Why does your chatbot need a personality?
Chatbots and/or voice assistants are built for human beings. Their purpose of existence is to create better interactions between humans and computers. This makes the need to create more life-like and intimate conversations between the two more important than ever.
As people, we naturally project human traits onto everything (anthropomorphism). However, businesses are now also able to control which human traits you want a user to see, meaning that chatbots no longer have to be lifeless pieces of technology.
Creating a personality for your chatbot also helps your business to understand the chatbot's end goal better and how the language, mood, tone and style of the bot will be designed.
Adding a Persona to your Chatbot
Unlike apps and websites which are designed to deliver the same UX for every user, chatbots interact on a one-to-one basis, delivering an experience that can be customised for each person.
At Stackchat, we believe that personifying a chatbot one of the steps in developing successful chatbots. Therefore, our platform provides businesses with the tools to quickly and easily add customisable personas.
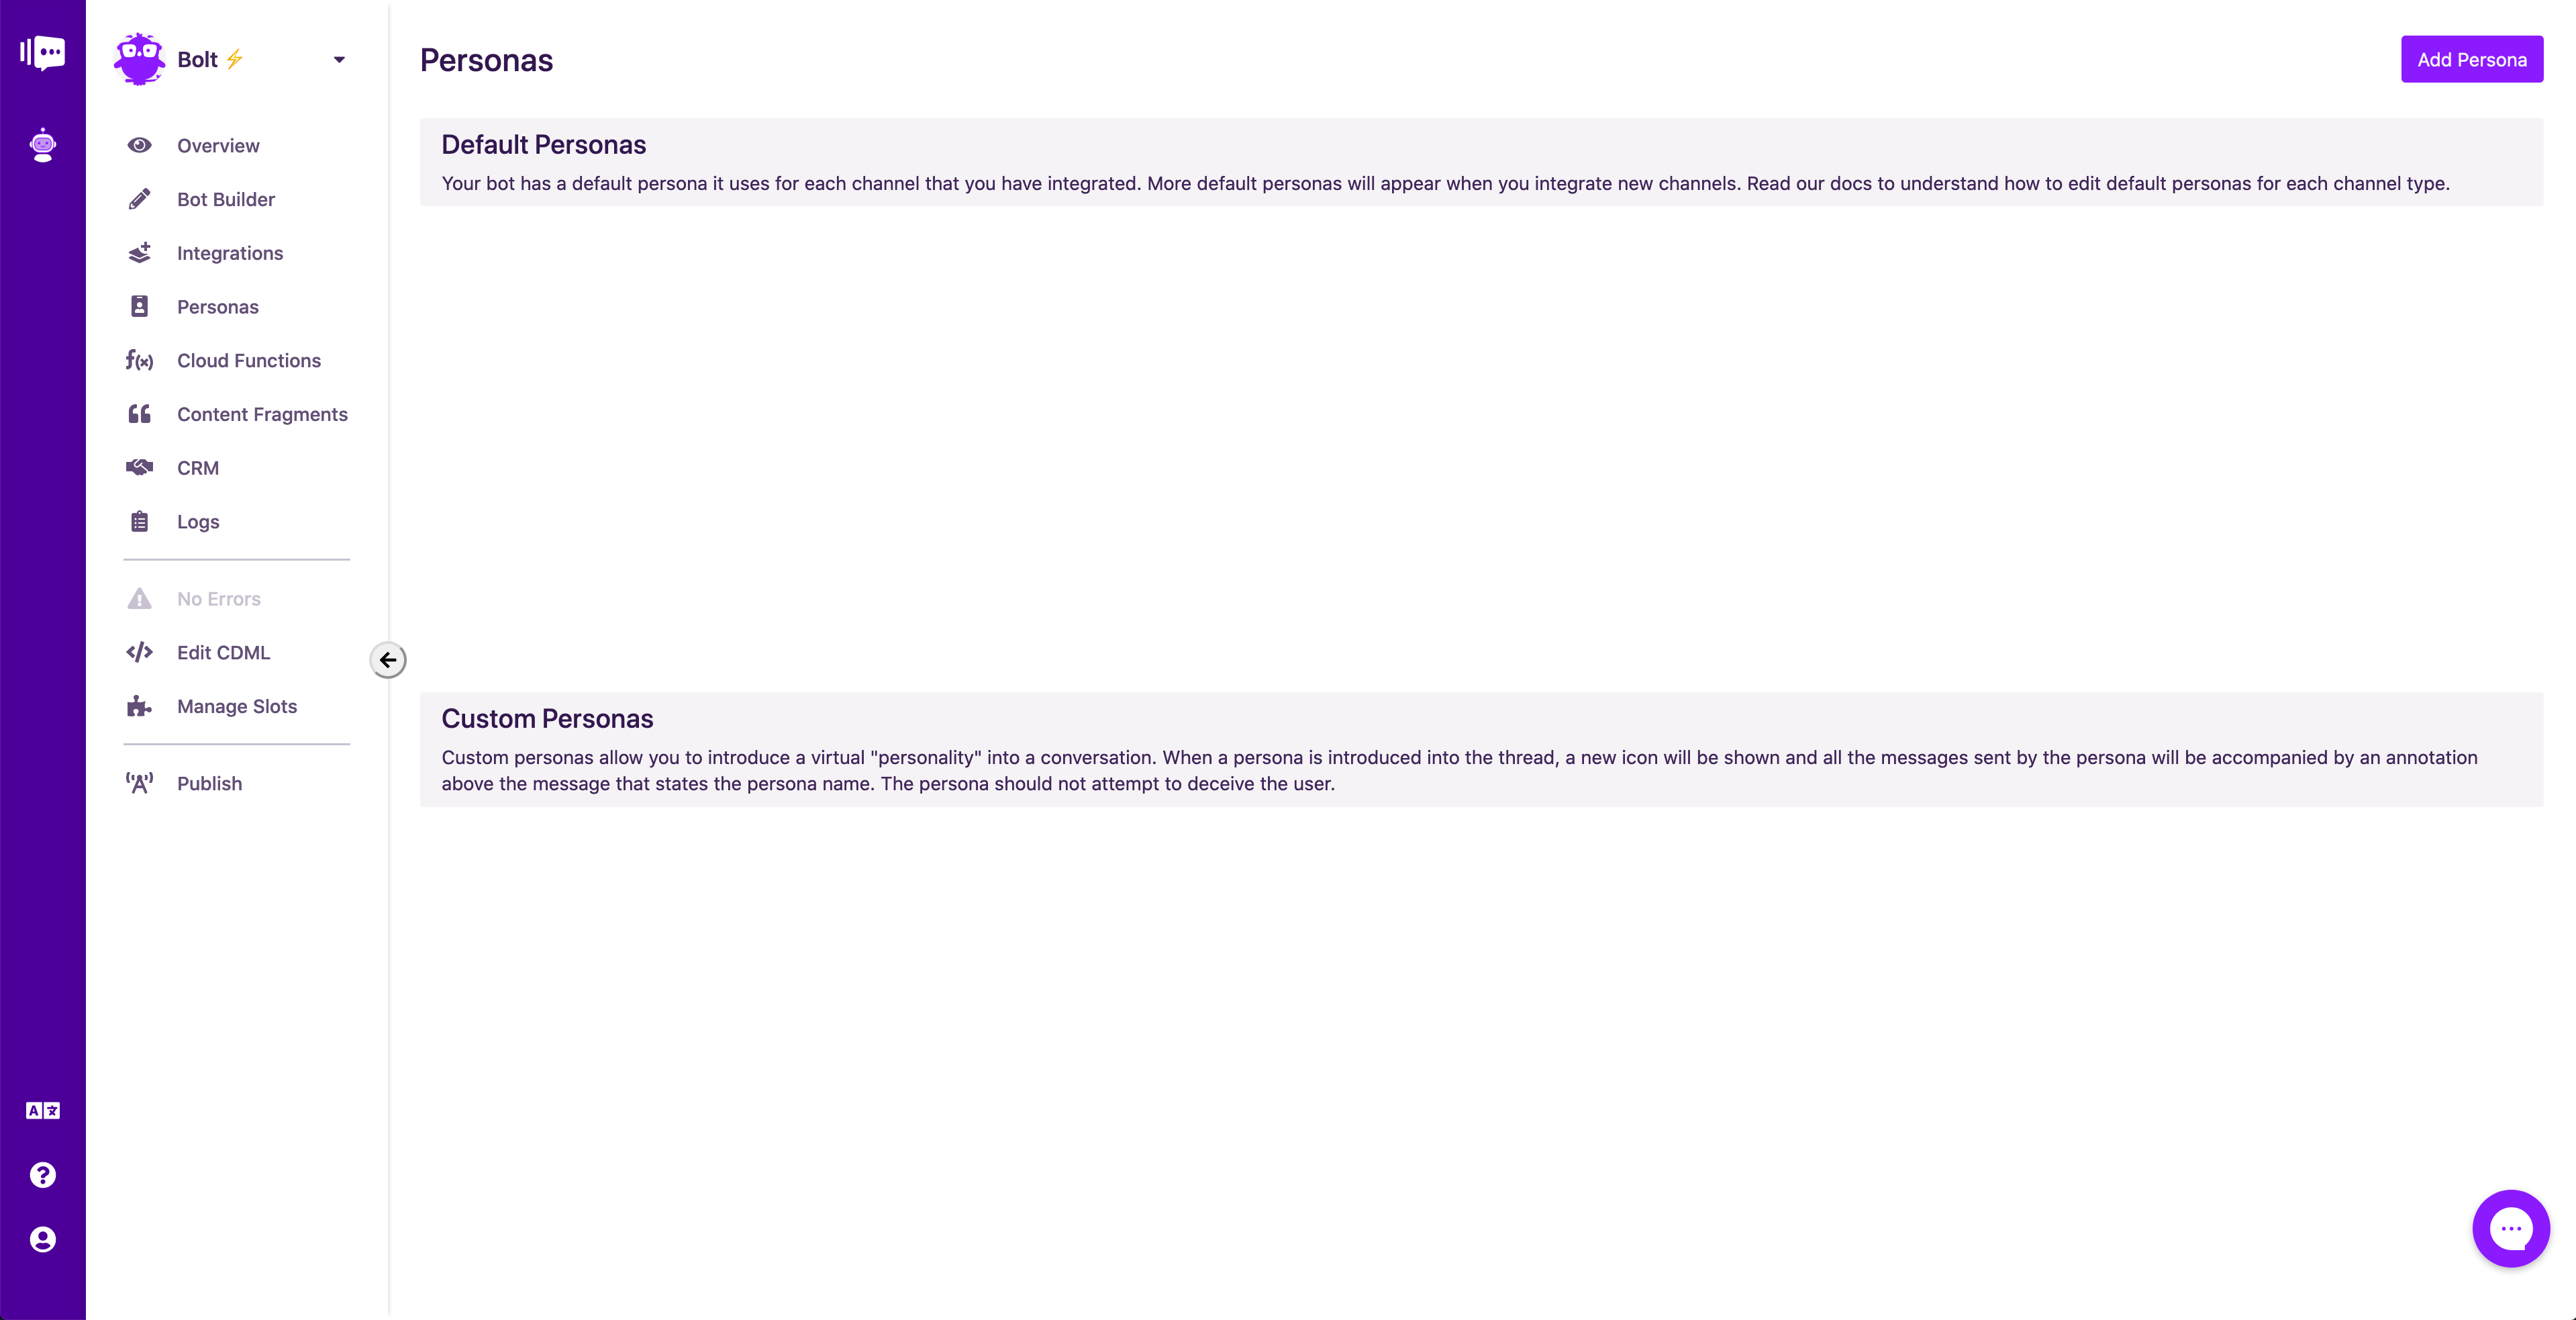 Personas in Stackchat Studio
Yet creating a personality does not only involve adding an avatar and a name. It should also include attributes that one looks for in a human person when they interact with them.
To understand this further, let’s walk through a simple scenario for a chatbot and built it out.
Our Scenario: Bolt, a company that specialises in electronics, wants to build a chatbot that allows users to send feedback about their customer experience. The chatbot should account for different types of feedback i.e. positive and negative and ensure that it responds in a polite and respectful manner.
Chatbot's Role
Chatbots are designed in order to advance business objectives. Therefore, the best way to start building your chatbot's personality is by determining the role your chatbot will play in your organisation. In other words,
What would be the chatbot's job title?
Our chatbot will be collecting feedback from our customers so "Feedback Assistant” would be an apt job title.
Chatbot's Job Description
Now that the chatbot’s role and function has been identified, the next step is to flesh out the job description for that position.
A simple way to do this is to research the requirements and responsibilities of that job title from real life examples.
The role of a Feedback Assistant often requires these things:
Responsibilities:
- Register and acknowledge feedback and/or complaints
- Handle routine questions and requests for information
- Greet all visitors and direct them accordingly
Qualifications:
- Approx. 2 years of experience or related experience
- Strong listening and communication skills
- Ability to handle issues with patience and politeness
- Must be reliable and dependable
- Able to maintain confidentiality at all times
With our job description now defined, we can begin designing a chatbot to be our perfect candidate.
Chatbot's Gender
We now have a clear idea of what our ideal employee and it’s time to choose the gender of your future employee.
For example, we could go with a woman in her mid 20s. However, gender specific chatbots are not always the most suitable. Depending on the role your chatbot plays in your business, the need for a gender can be unnecessary.
Chatbot's Name and Avatar
This is the part where your team can get creative. At Stackchat, we came up for the name of our web chatbot by taking the first half of the company - Stack - and adding a simple "ley" on the end, creating Stackley.
When creating a name, it is also important to understand that you don't want to confuse the user about whether or not they're actually speaking with a real human. This is why the approach of making up a new name entirely is best suited to the overall design of a bot.
For this scenario, let’s also take the approach of creating a name around the company itself. The word Bolt is often mentioned in reference to as a "bolt of lightning", and what does a bolt of lightning do? It flashs in the sky. So, let's have some fun and name Bolt's chatbot, Flash.
Visualising the Chatbot
The final step in the background information is to combine all the parts together into a visual. This can be done through the creation of an ID badge for your chatbot.
Flash’s badge could look like this:
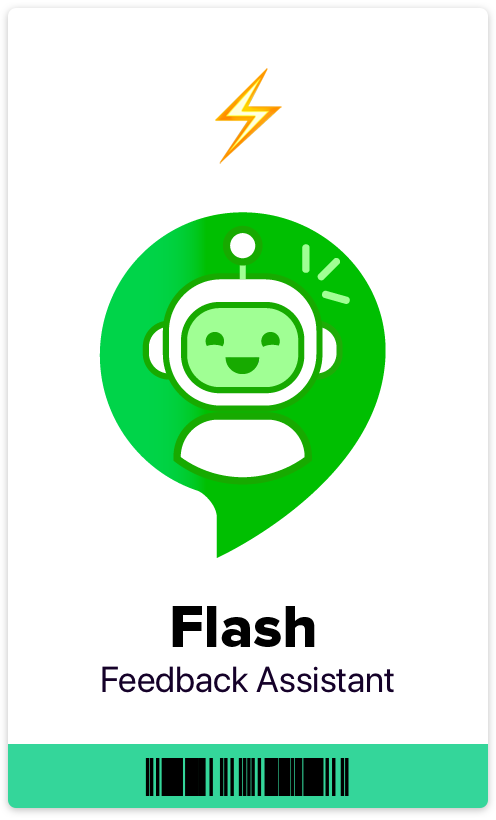 Bolt's feedback assistant - Flash
Building the Chatbot
Now that we have decided upon the entire personality of the chatbot, it’s time to create it.
As the scenario instructed, the chatbot must be respectful and polite. Therefore, the overarching tone when designing the chat has to reflect this. This is important to remember because it will ultimately affect each user interaction that is created.
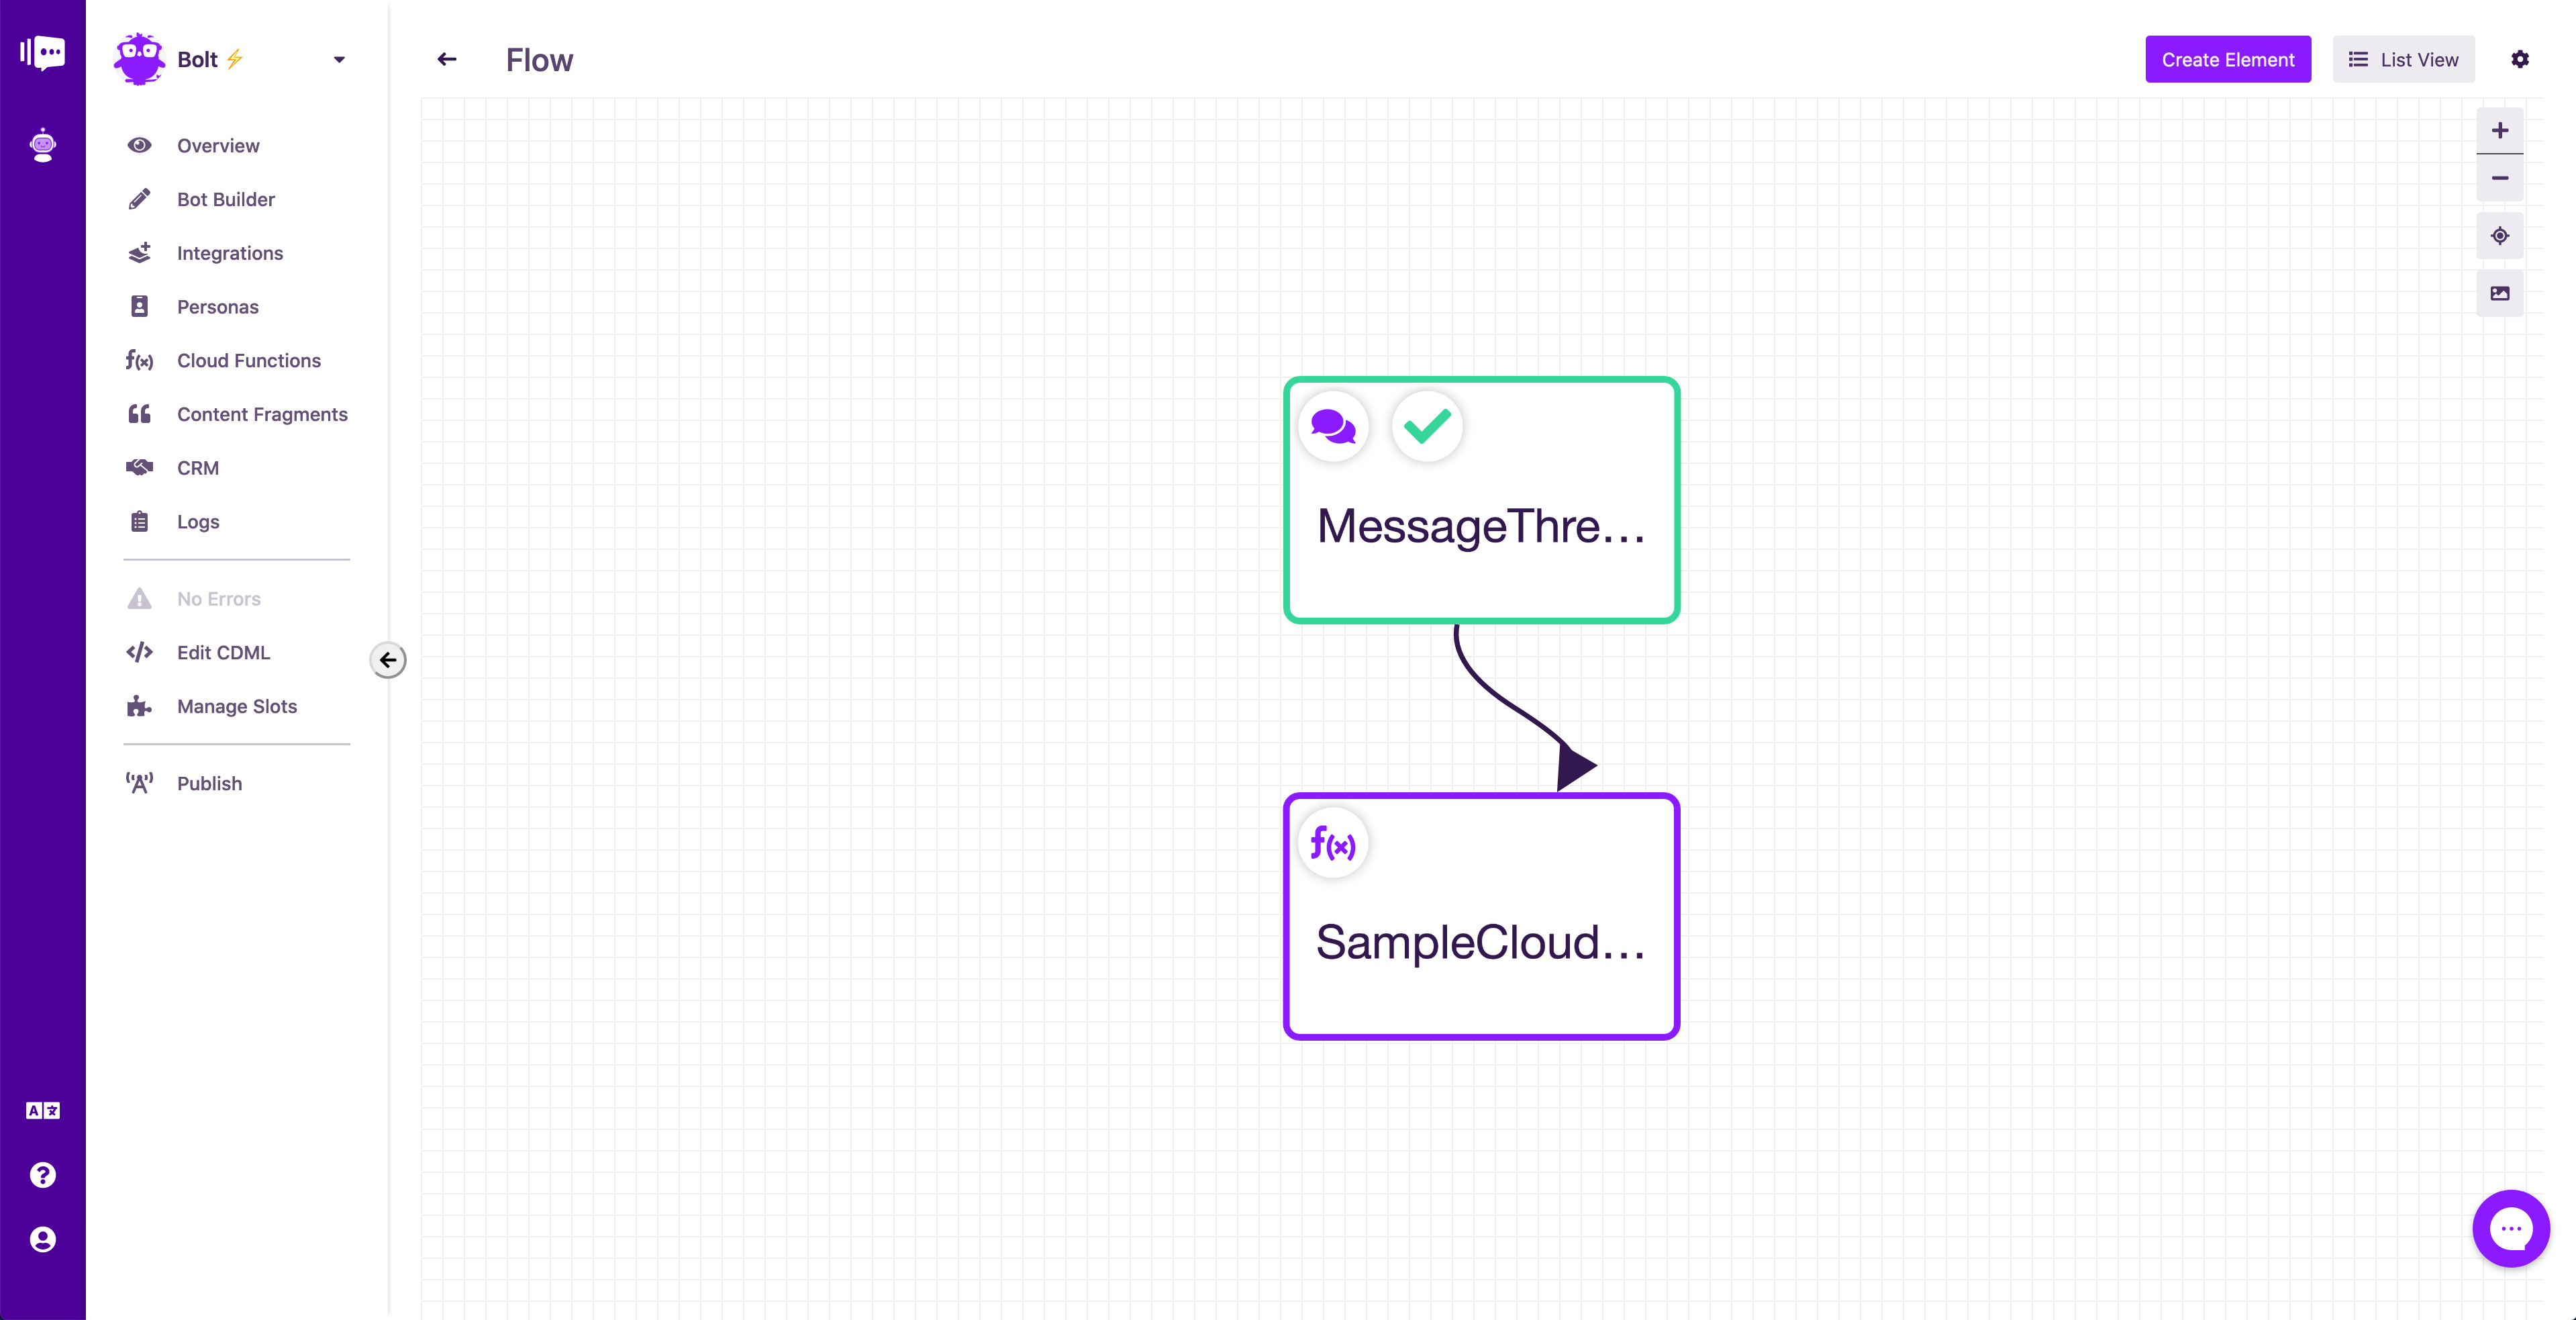
So, let’s start building. This is the Bot Builder section of Stackchat Studio. This is where you create your conversation flows. Flows are the containers that house the messages that users will interact with.
 Building Bolt - At the start
For this chatbot to be able to direct customer queries appropriately, it will need to gather certain points of information about the user: name, email address and the actual feedback and/or complaint they would like to make. To do this, we will need to create custom slots that will hold this information for us.
Below are four slots that are titled appropriately for the information we wish to gather.
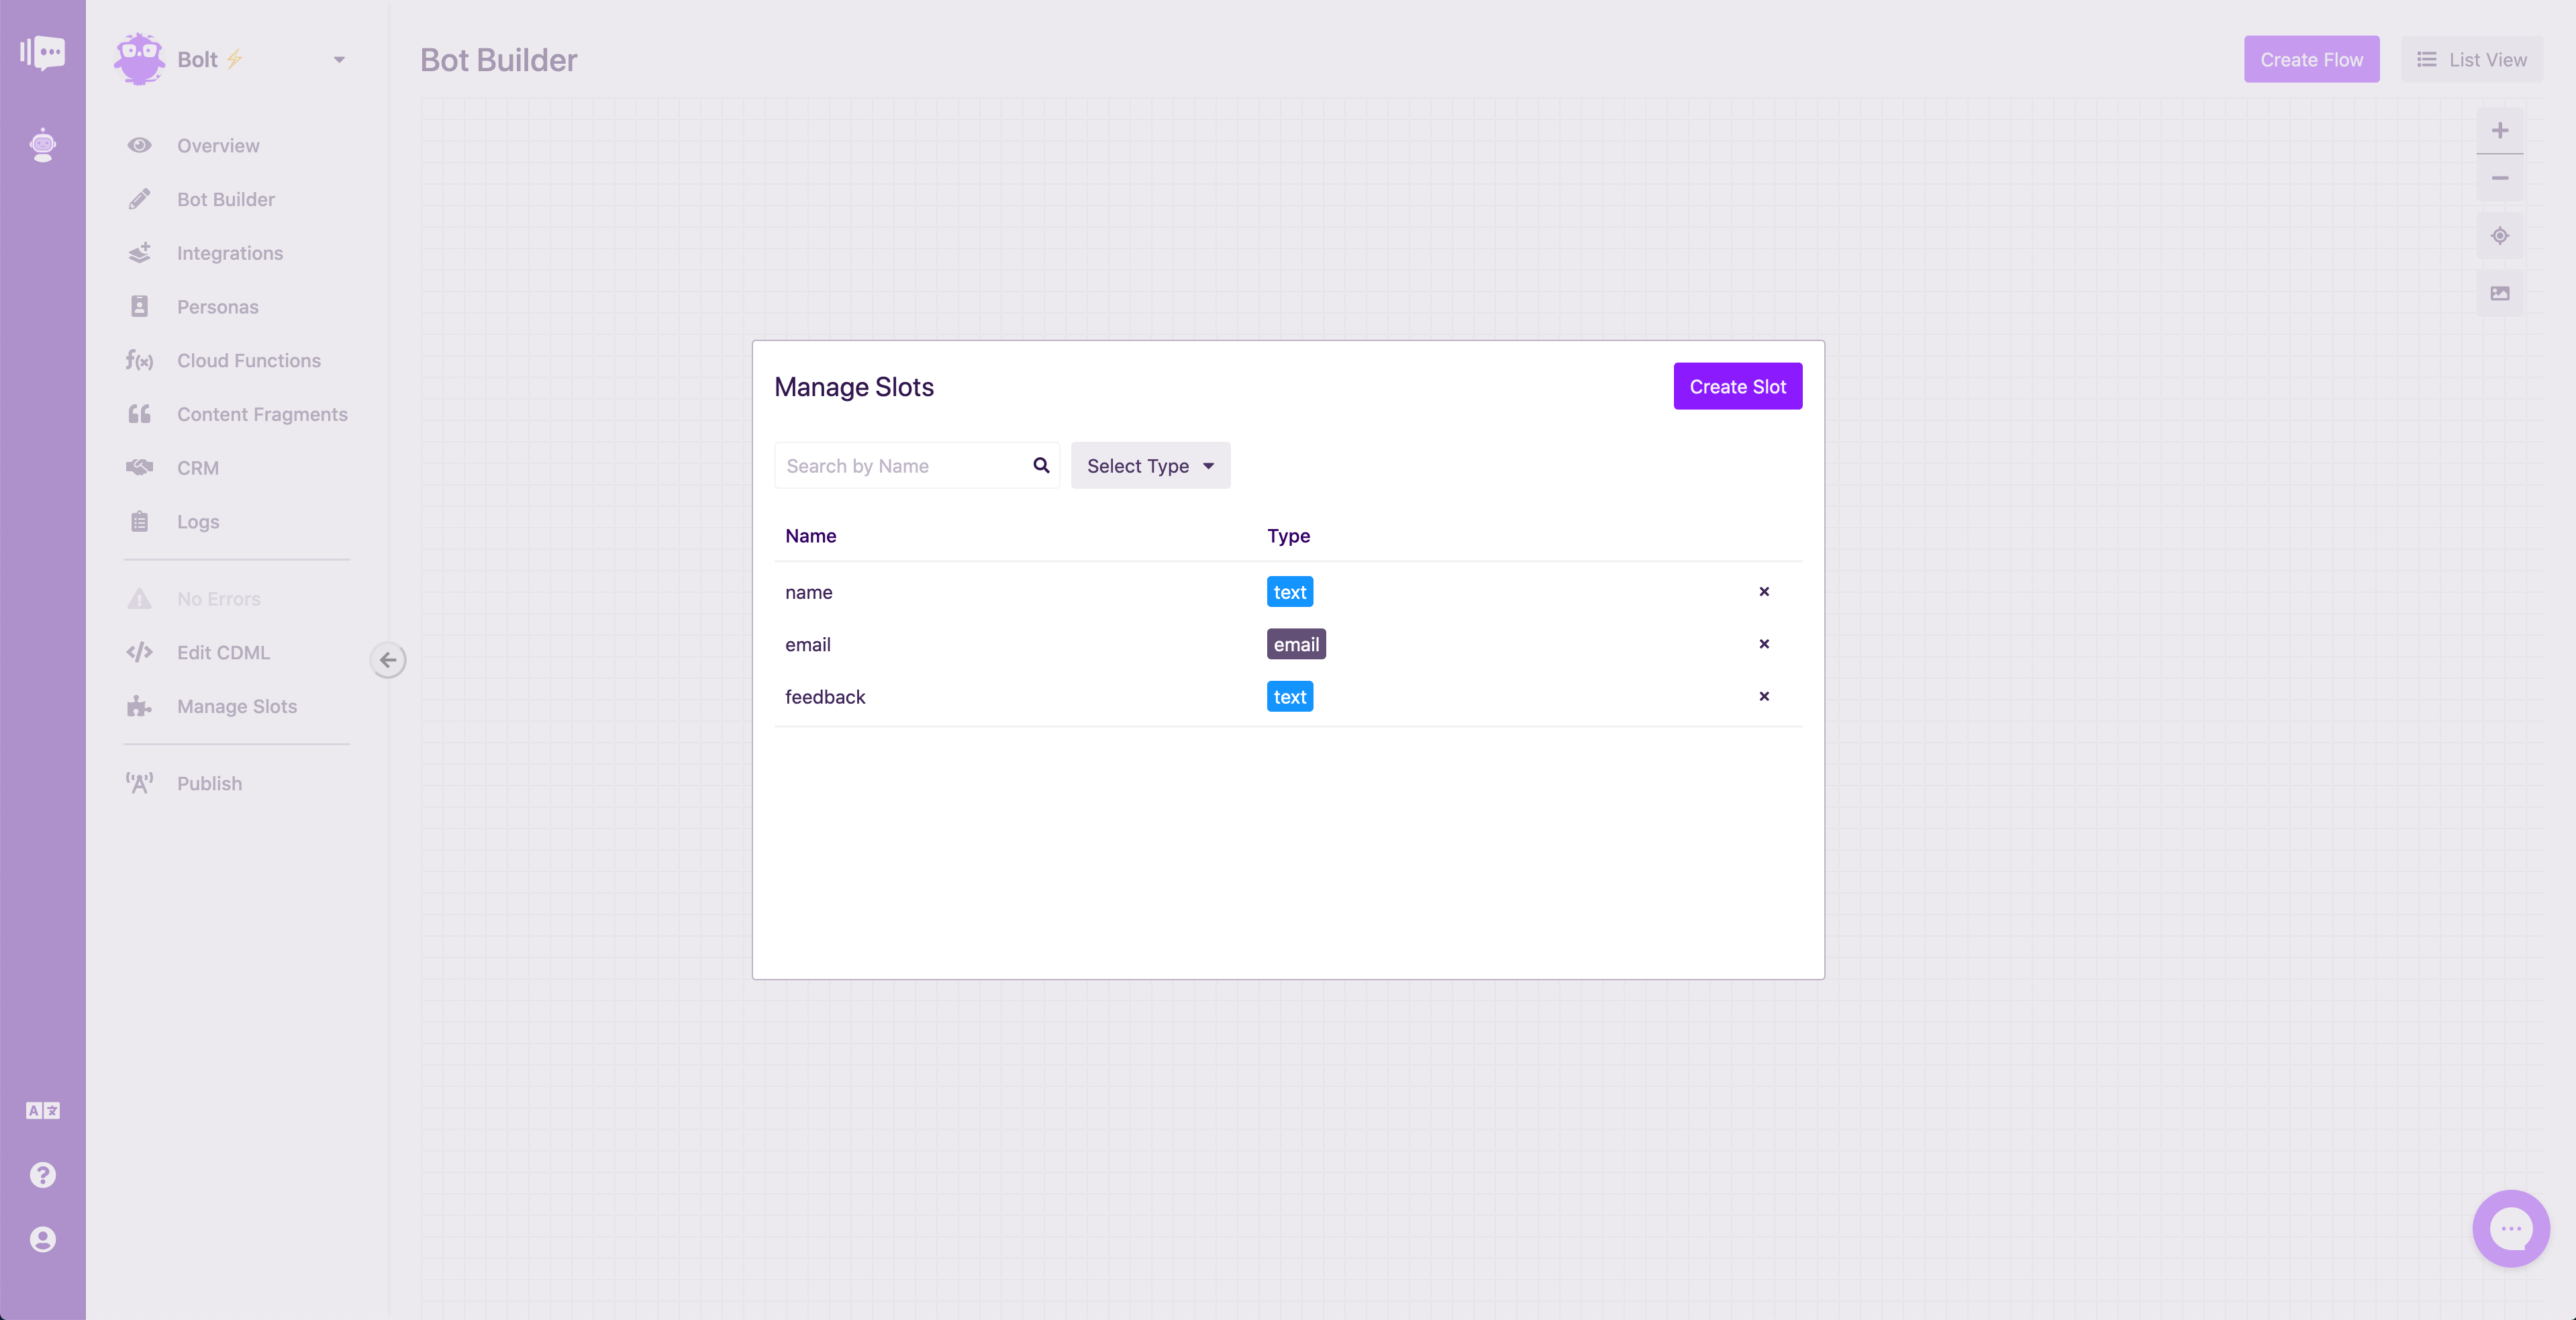 Building Bolt - Custom slots
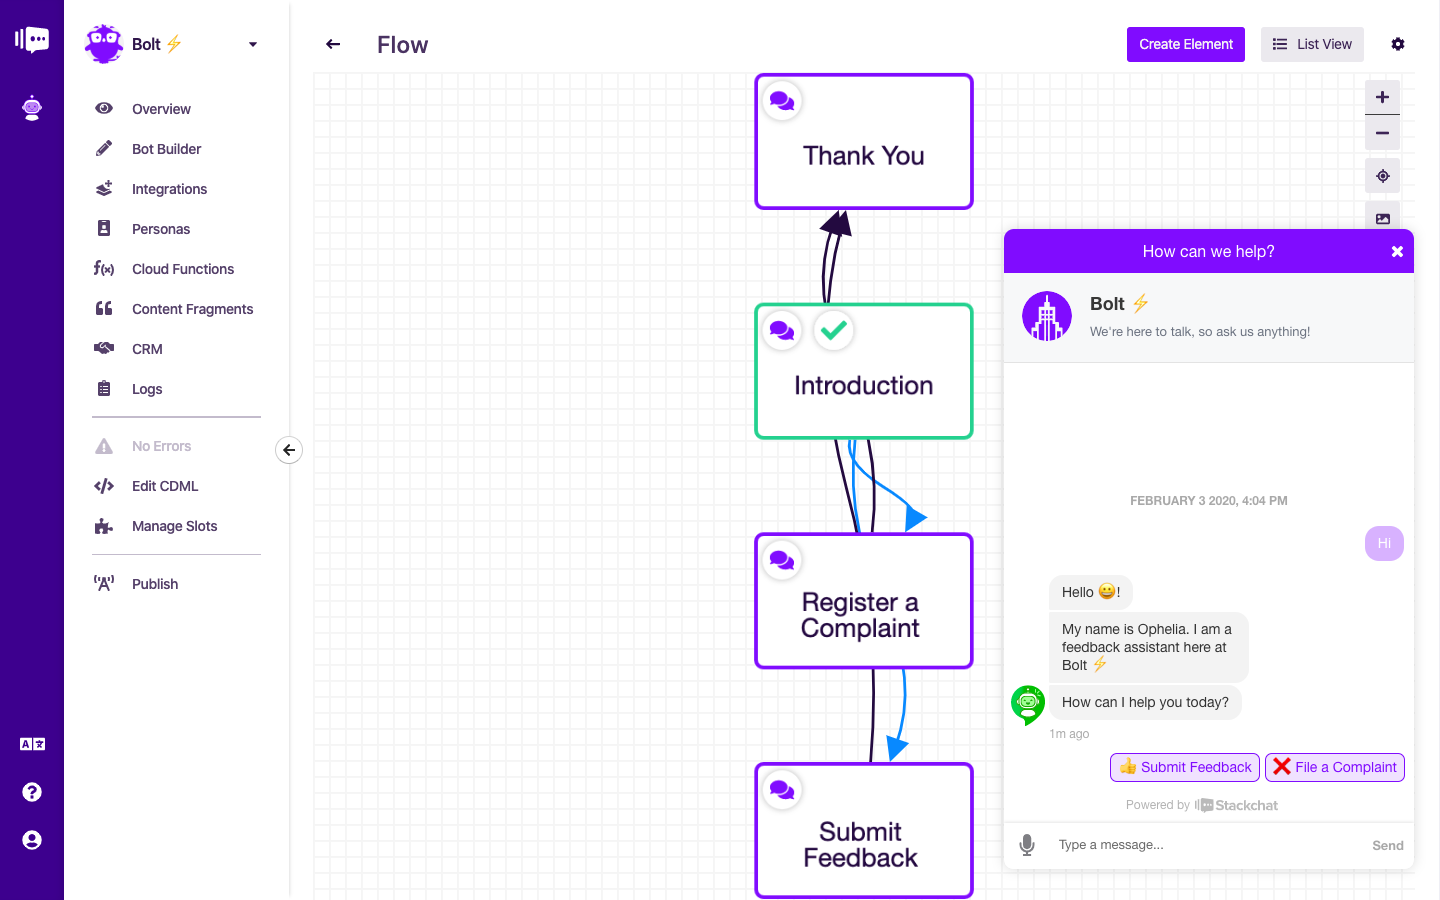
Now that we have the slots ready, we must create the message threads that will lead to the information being collected.
 Building Bolt - Elements inside Flow
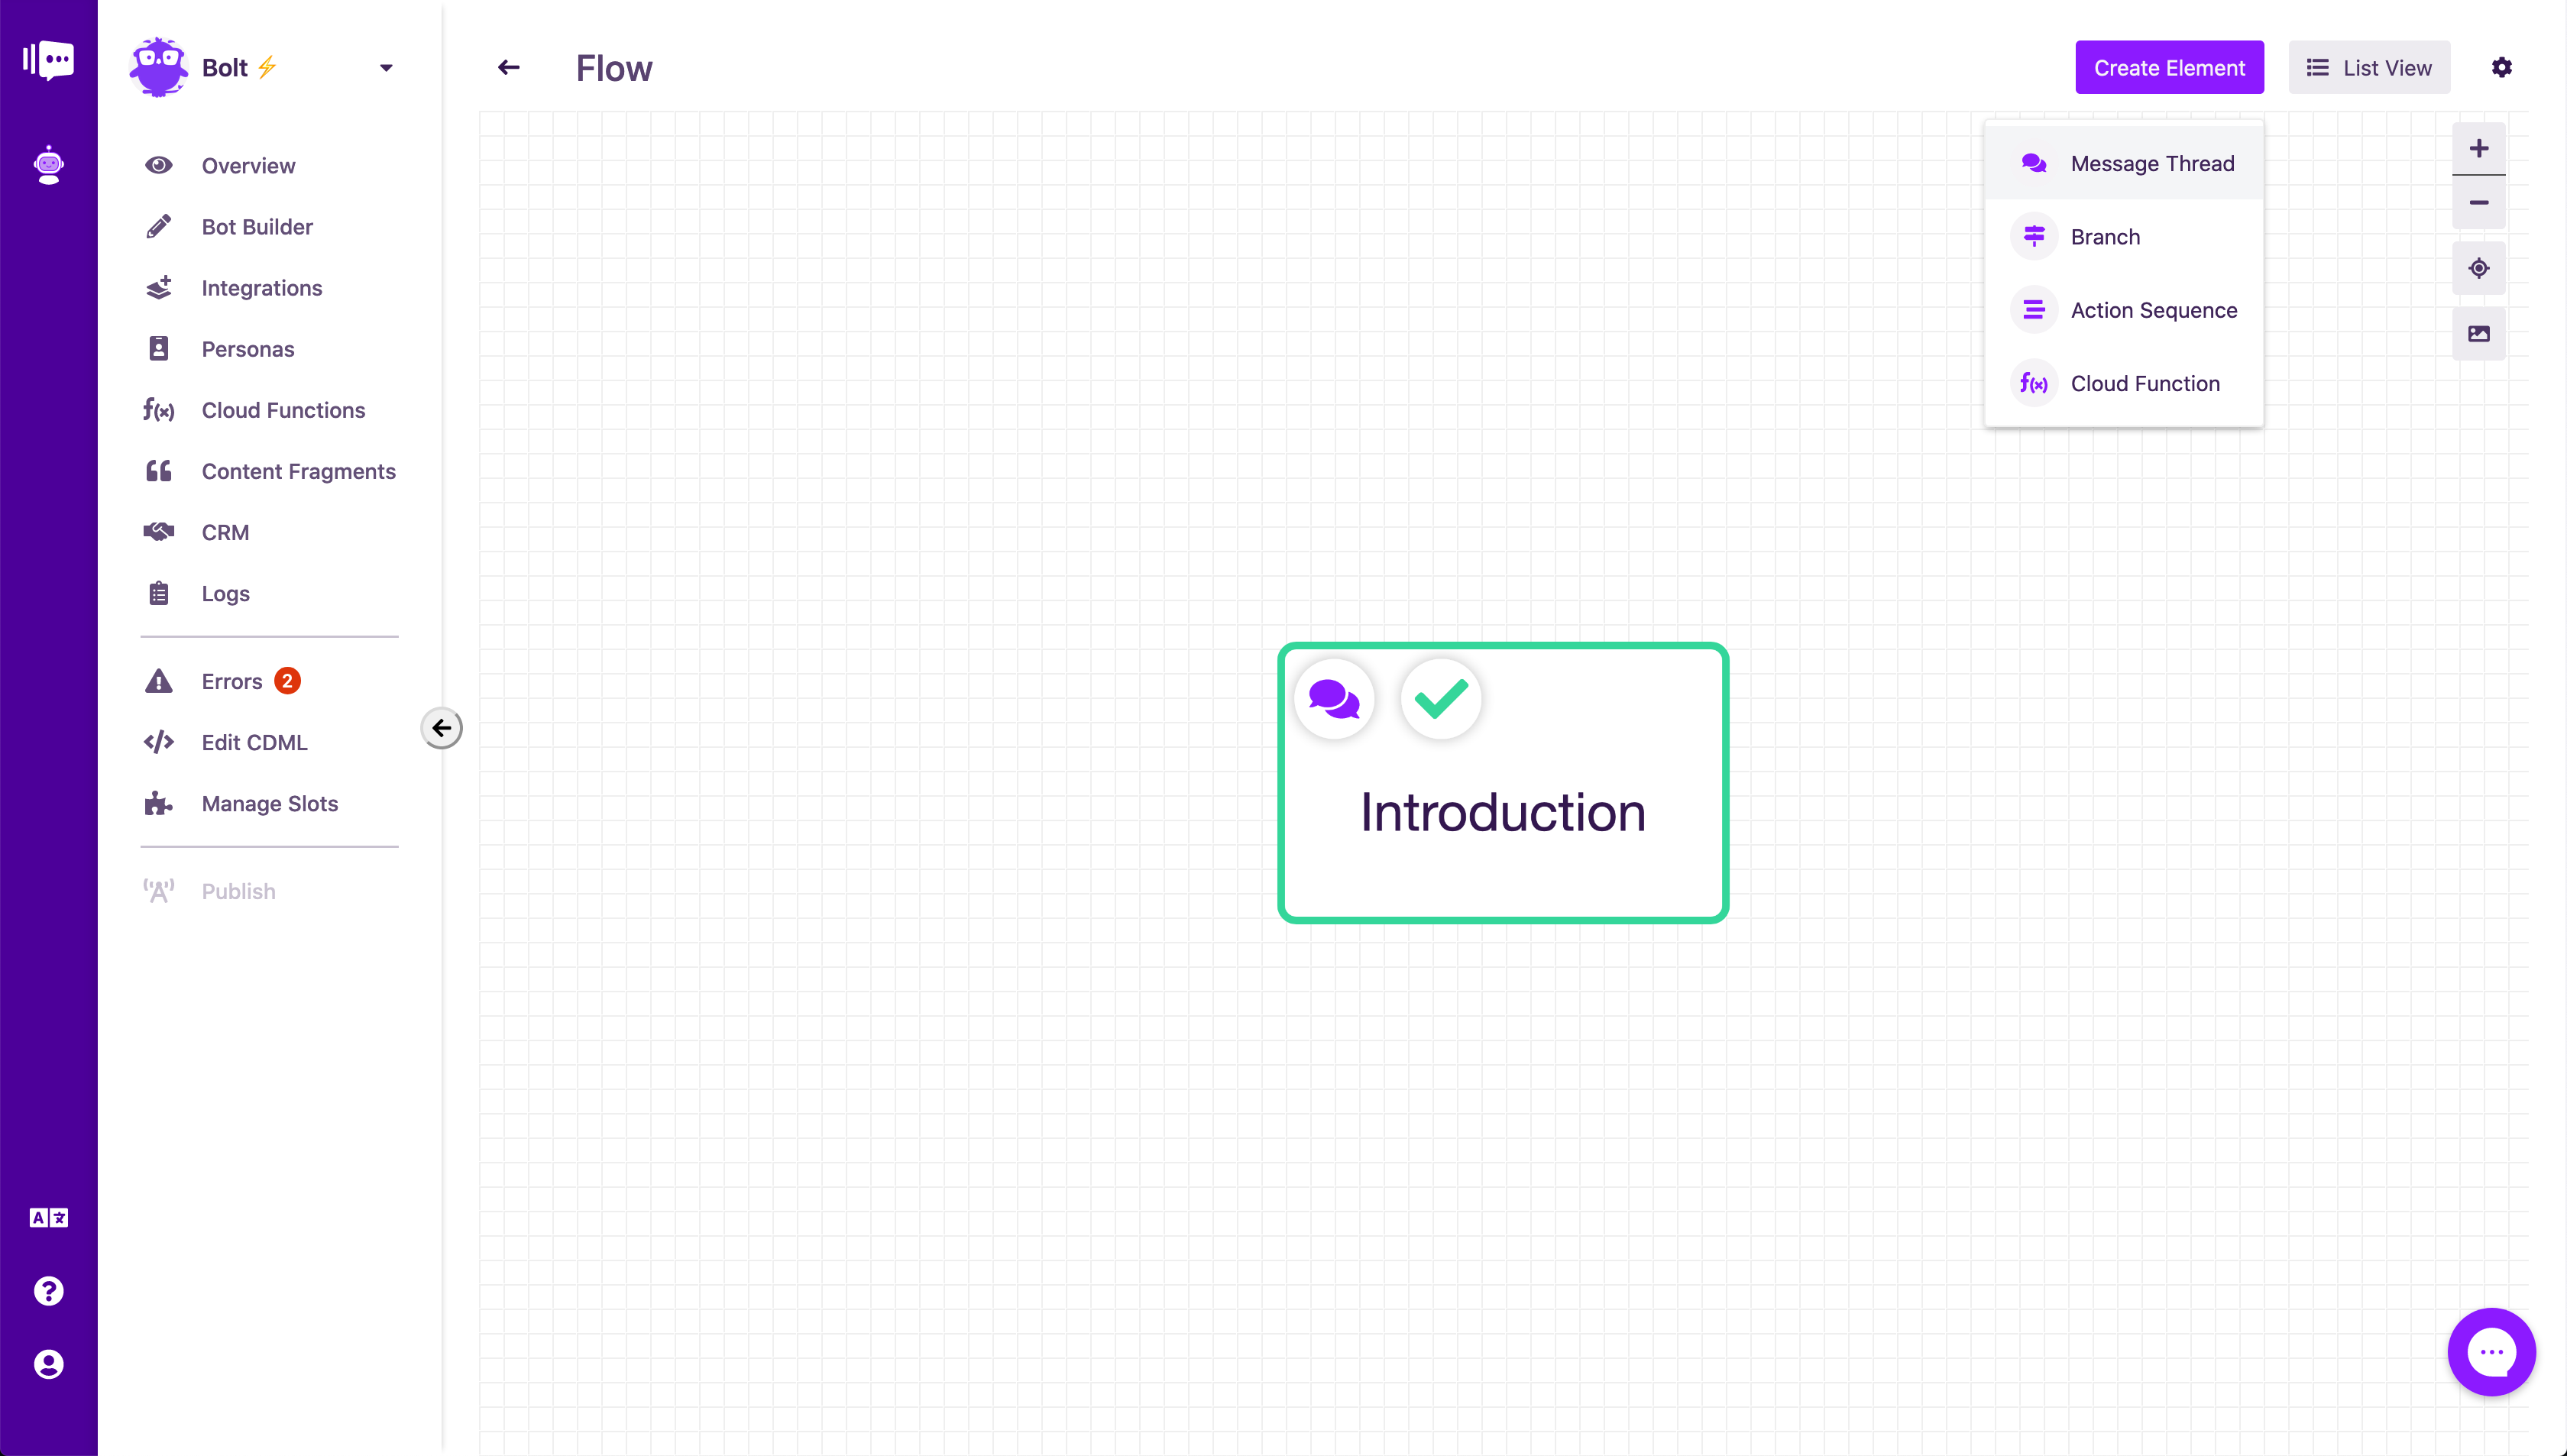
To do this, we will double click on the flow provided. We are now inside the container. On this screen you will find the option to add elements to your flow. There is an option to add Elements which is the feature that allows us to create the text or actions we wish the user to see or undertake.
Now, let's add a couple of initial messages which will greet the user when they first interact with the chatbot.
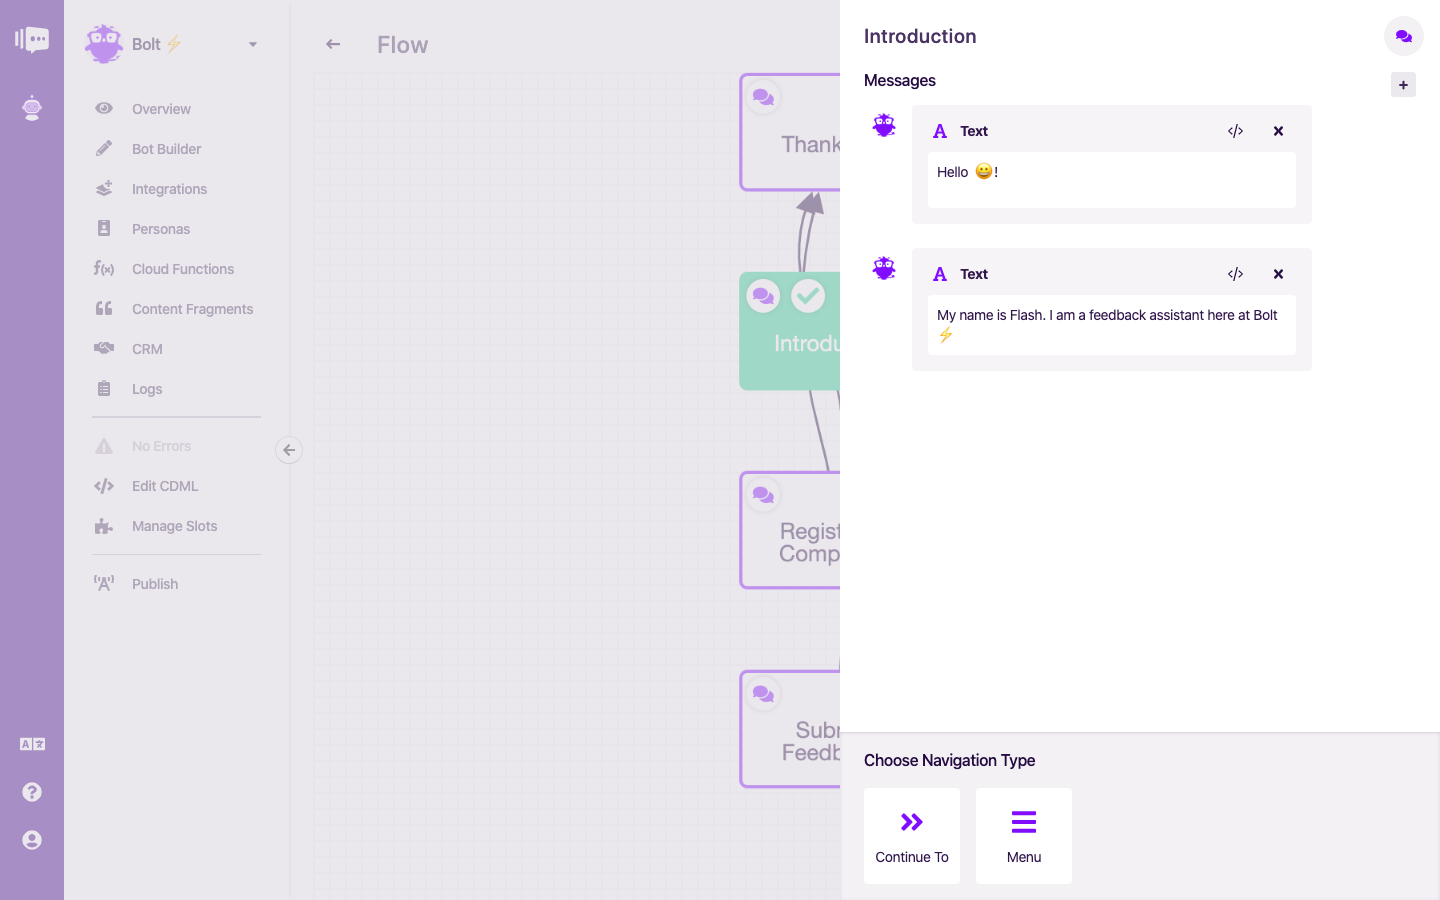 Building Bolt - Introduction
Since we want the conversation to feel natural, we are going to provide the user with the option to reply instead of jumping right into the query itself. This will allow us to have control over what action the user would like to take and to design the chat accordingly.
In order to direct the user to a different place in the conversation, we will need to create more than one element. Since we added two possible responses, we have to create two new message threads - one for complaints and one for feedback.
 Building Bolt - Adding a Message Thread
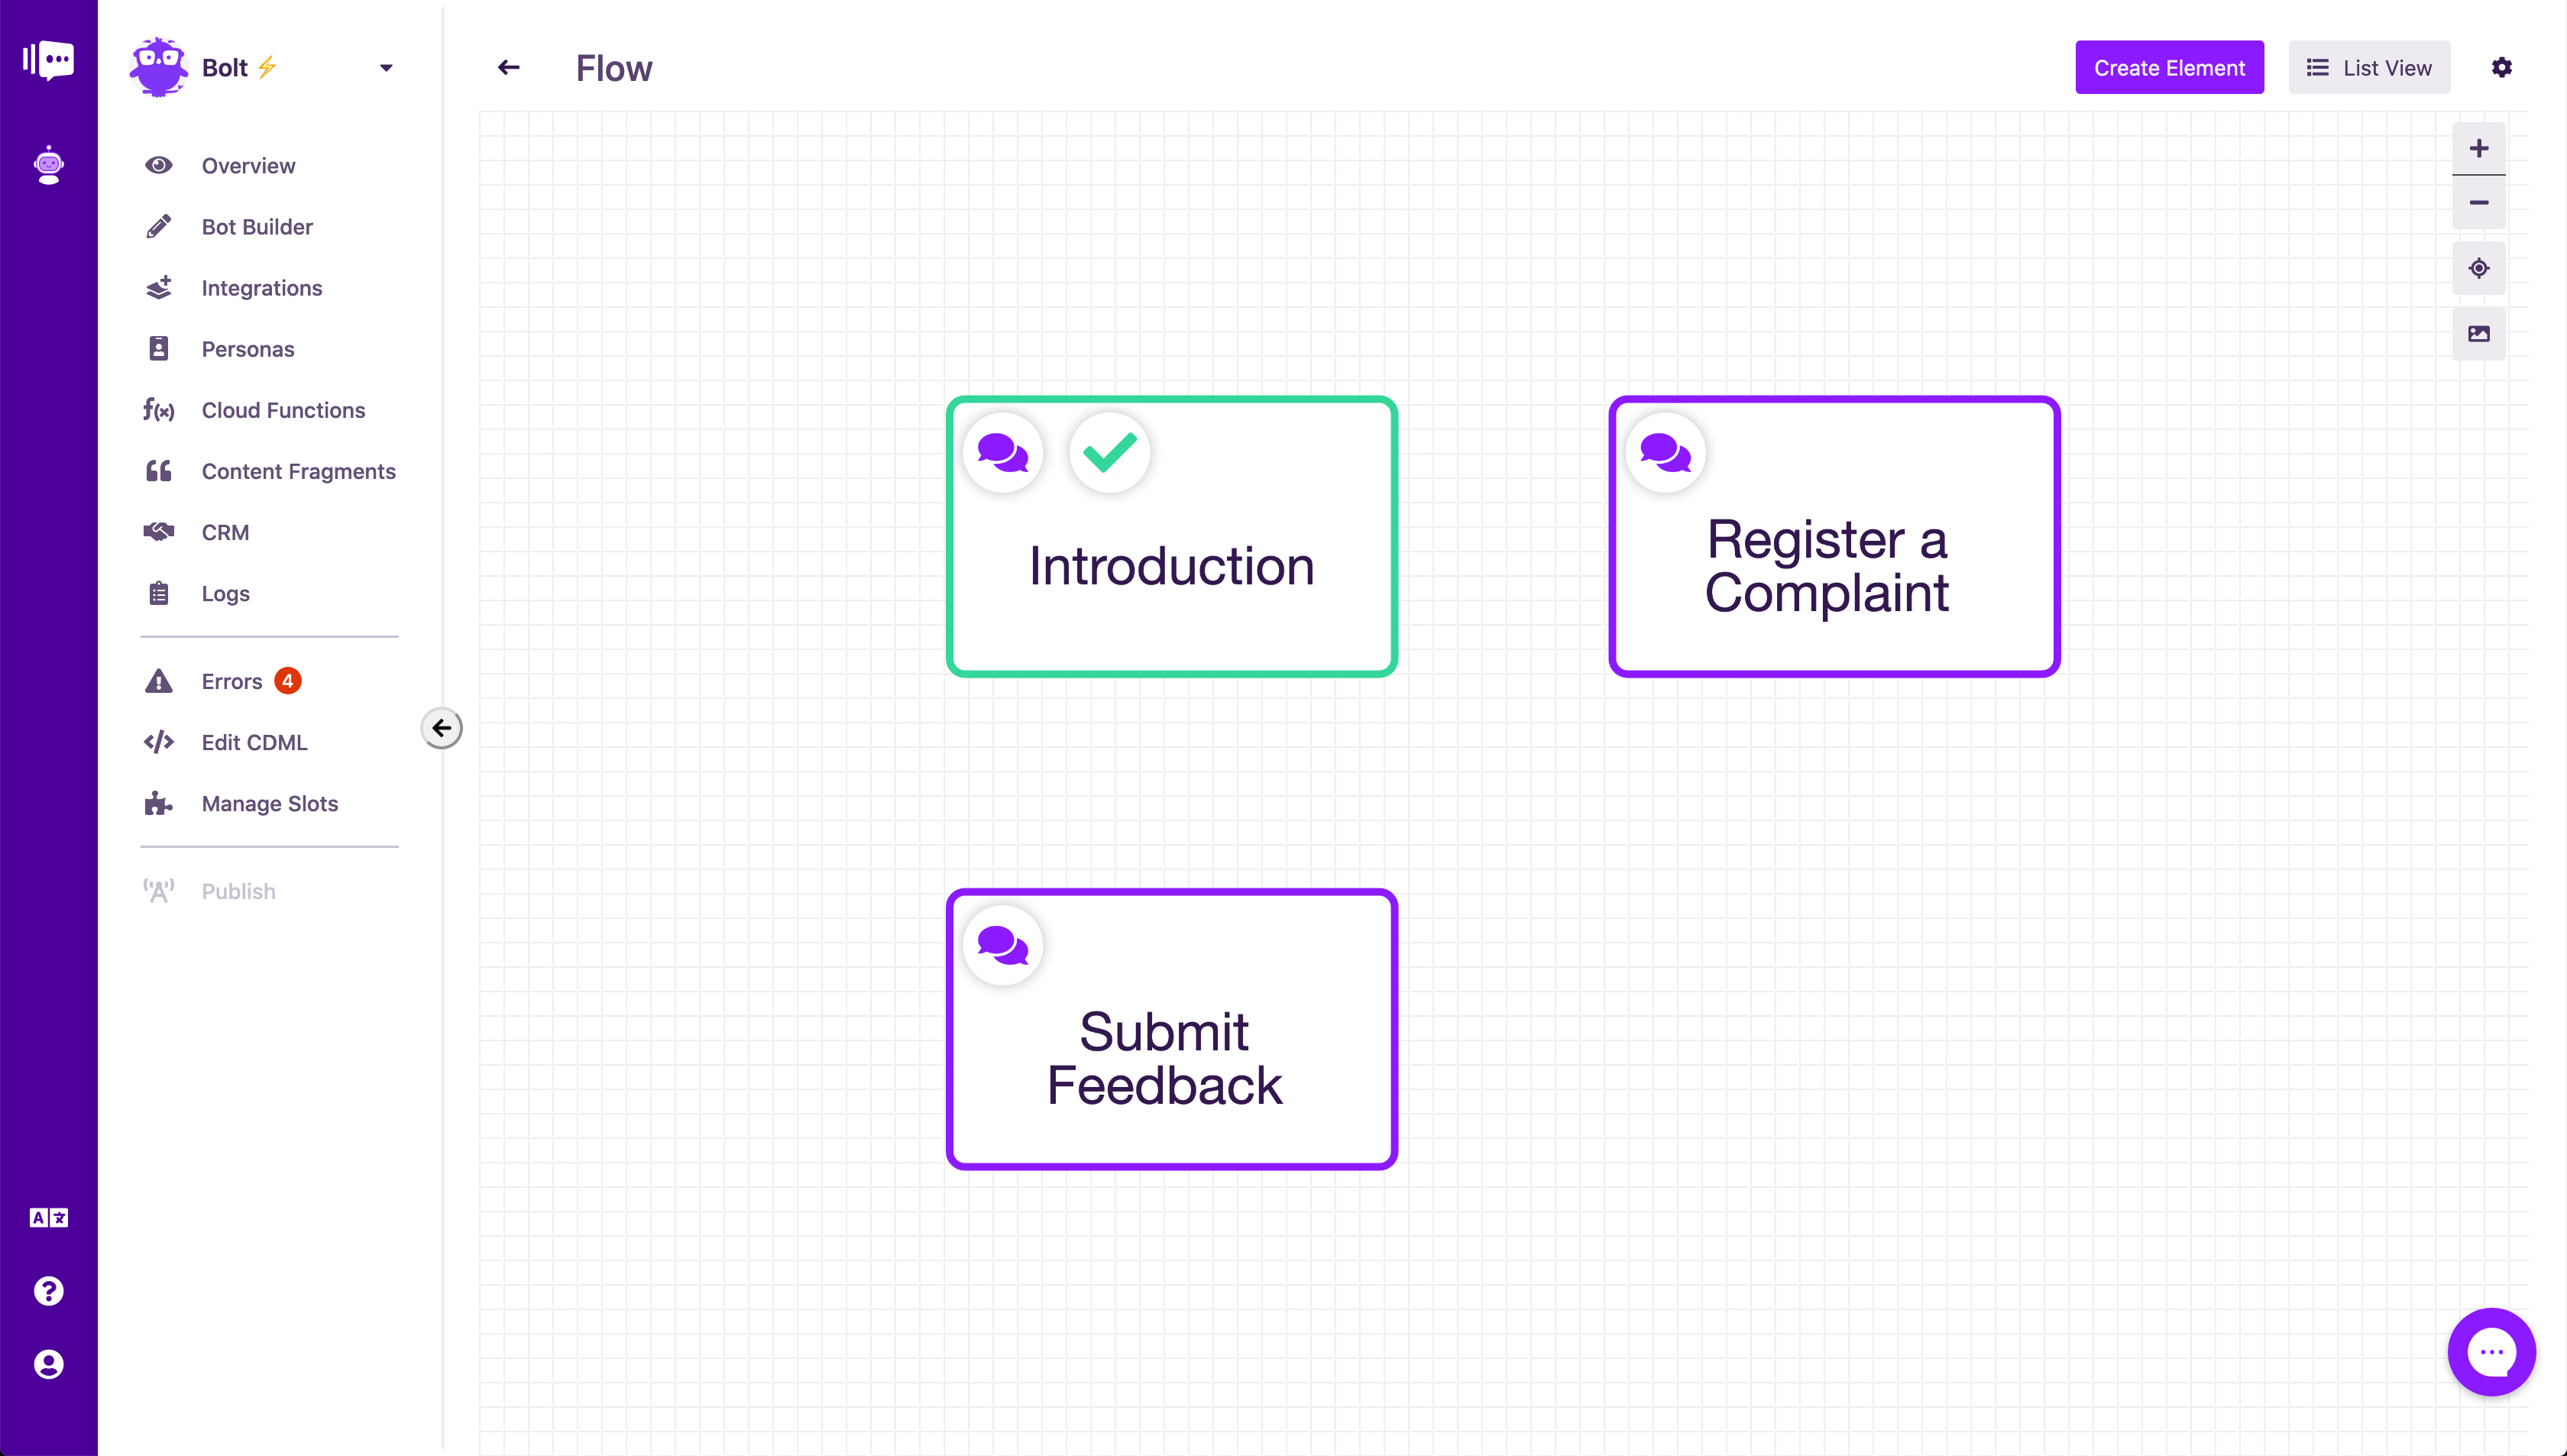 Building Bolt - After adding the Message Threads
Now, if we go back to our first element, we can set the two new elements as the navigation targets.
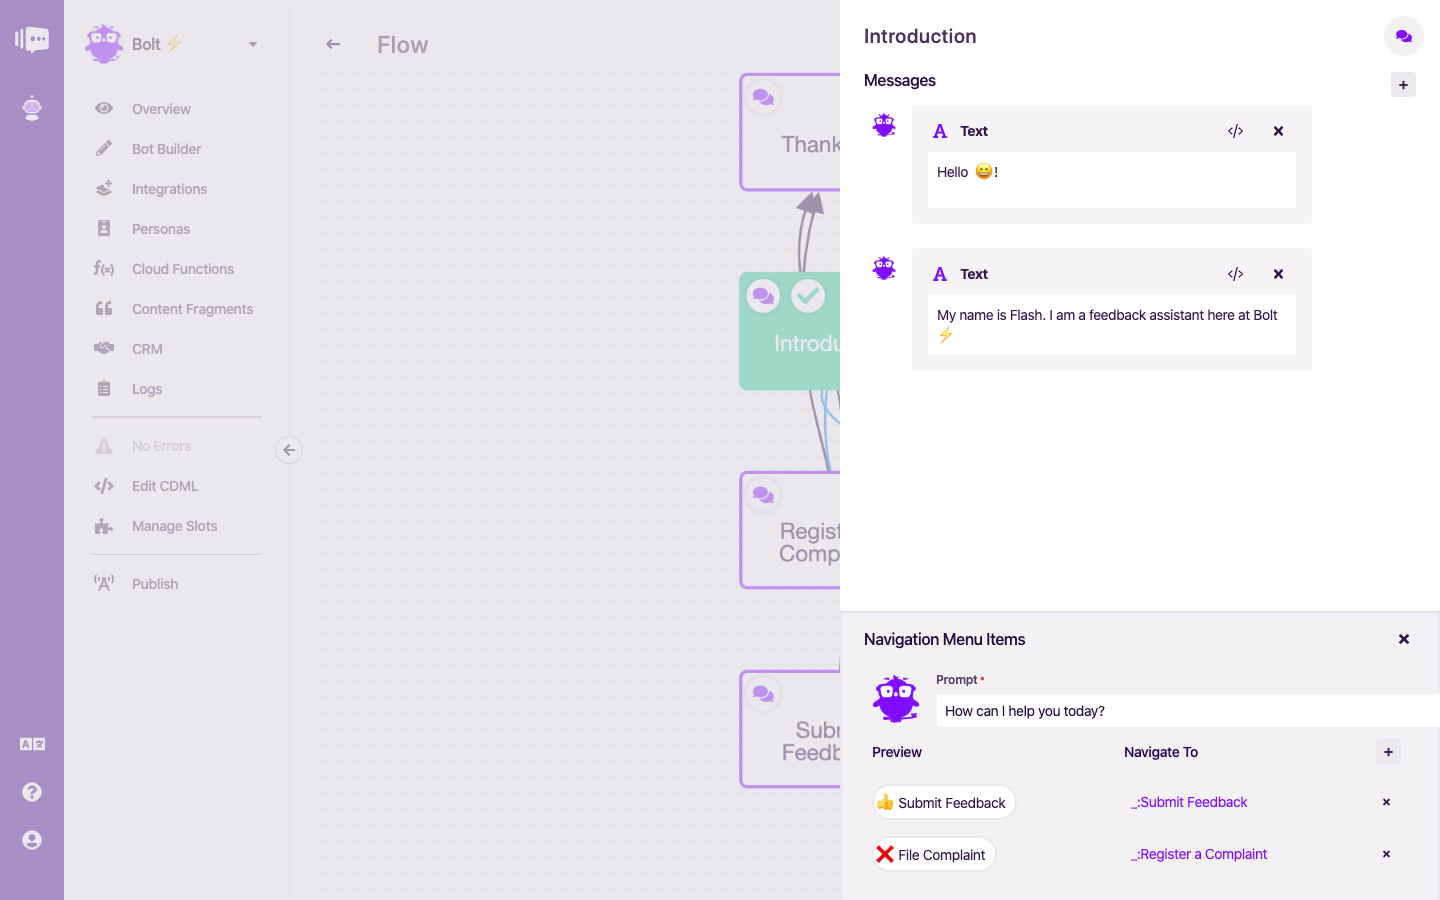 Building Bolt - After setting navigation targets
Let's also go and flesh out the contents of these two elements:
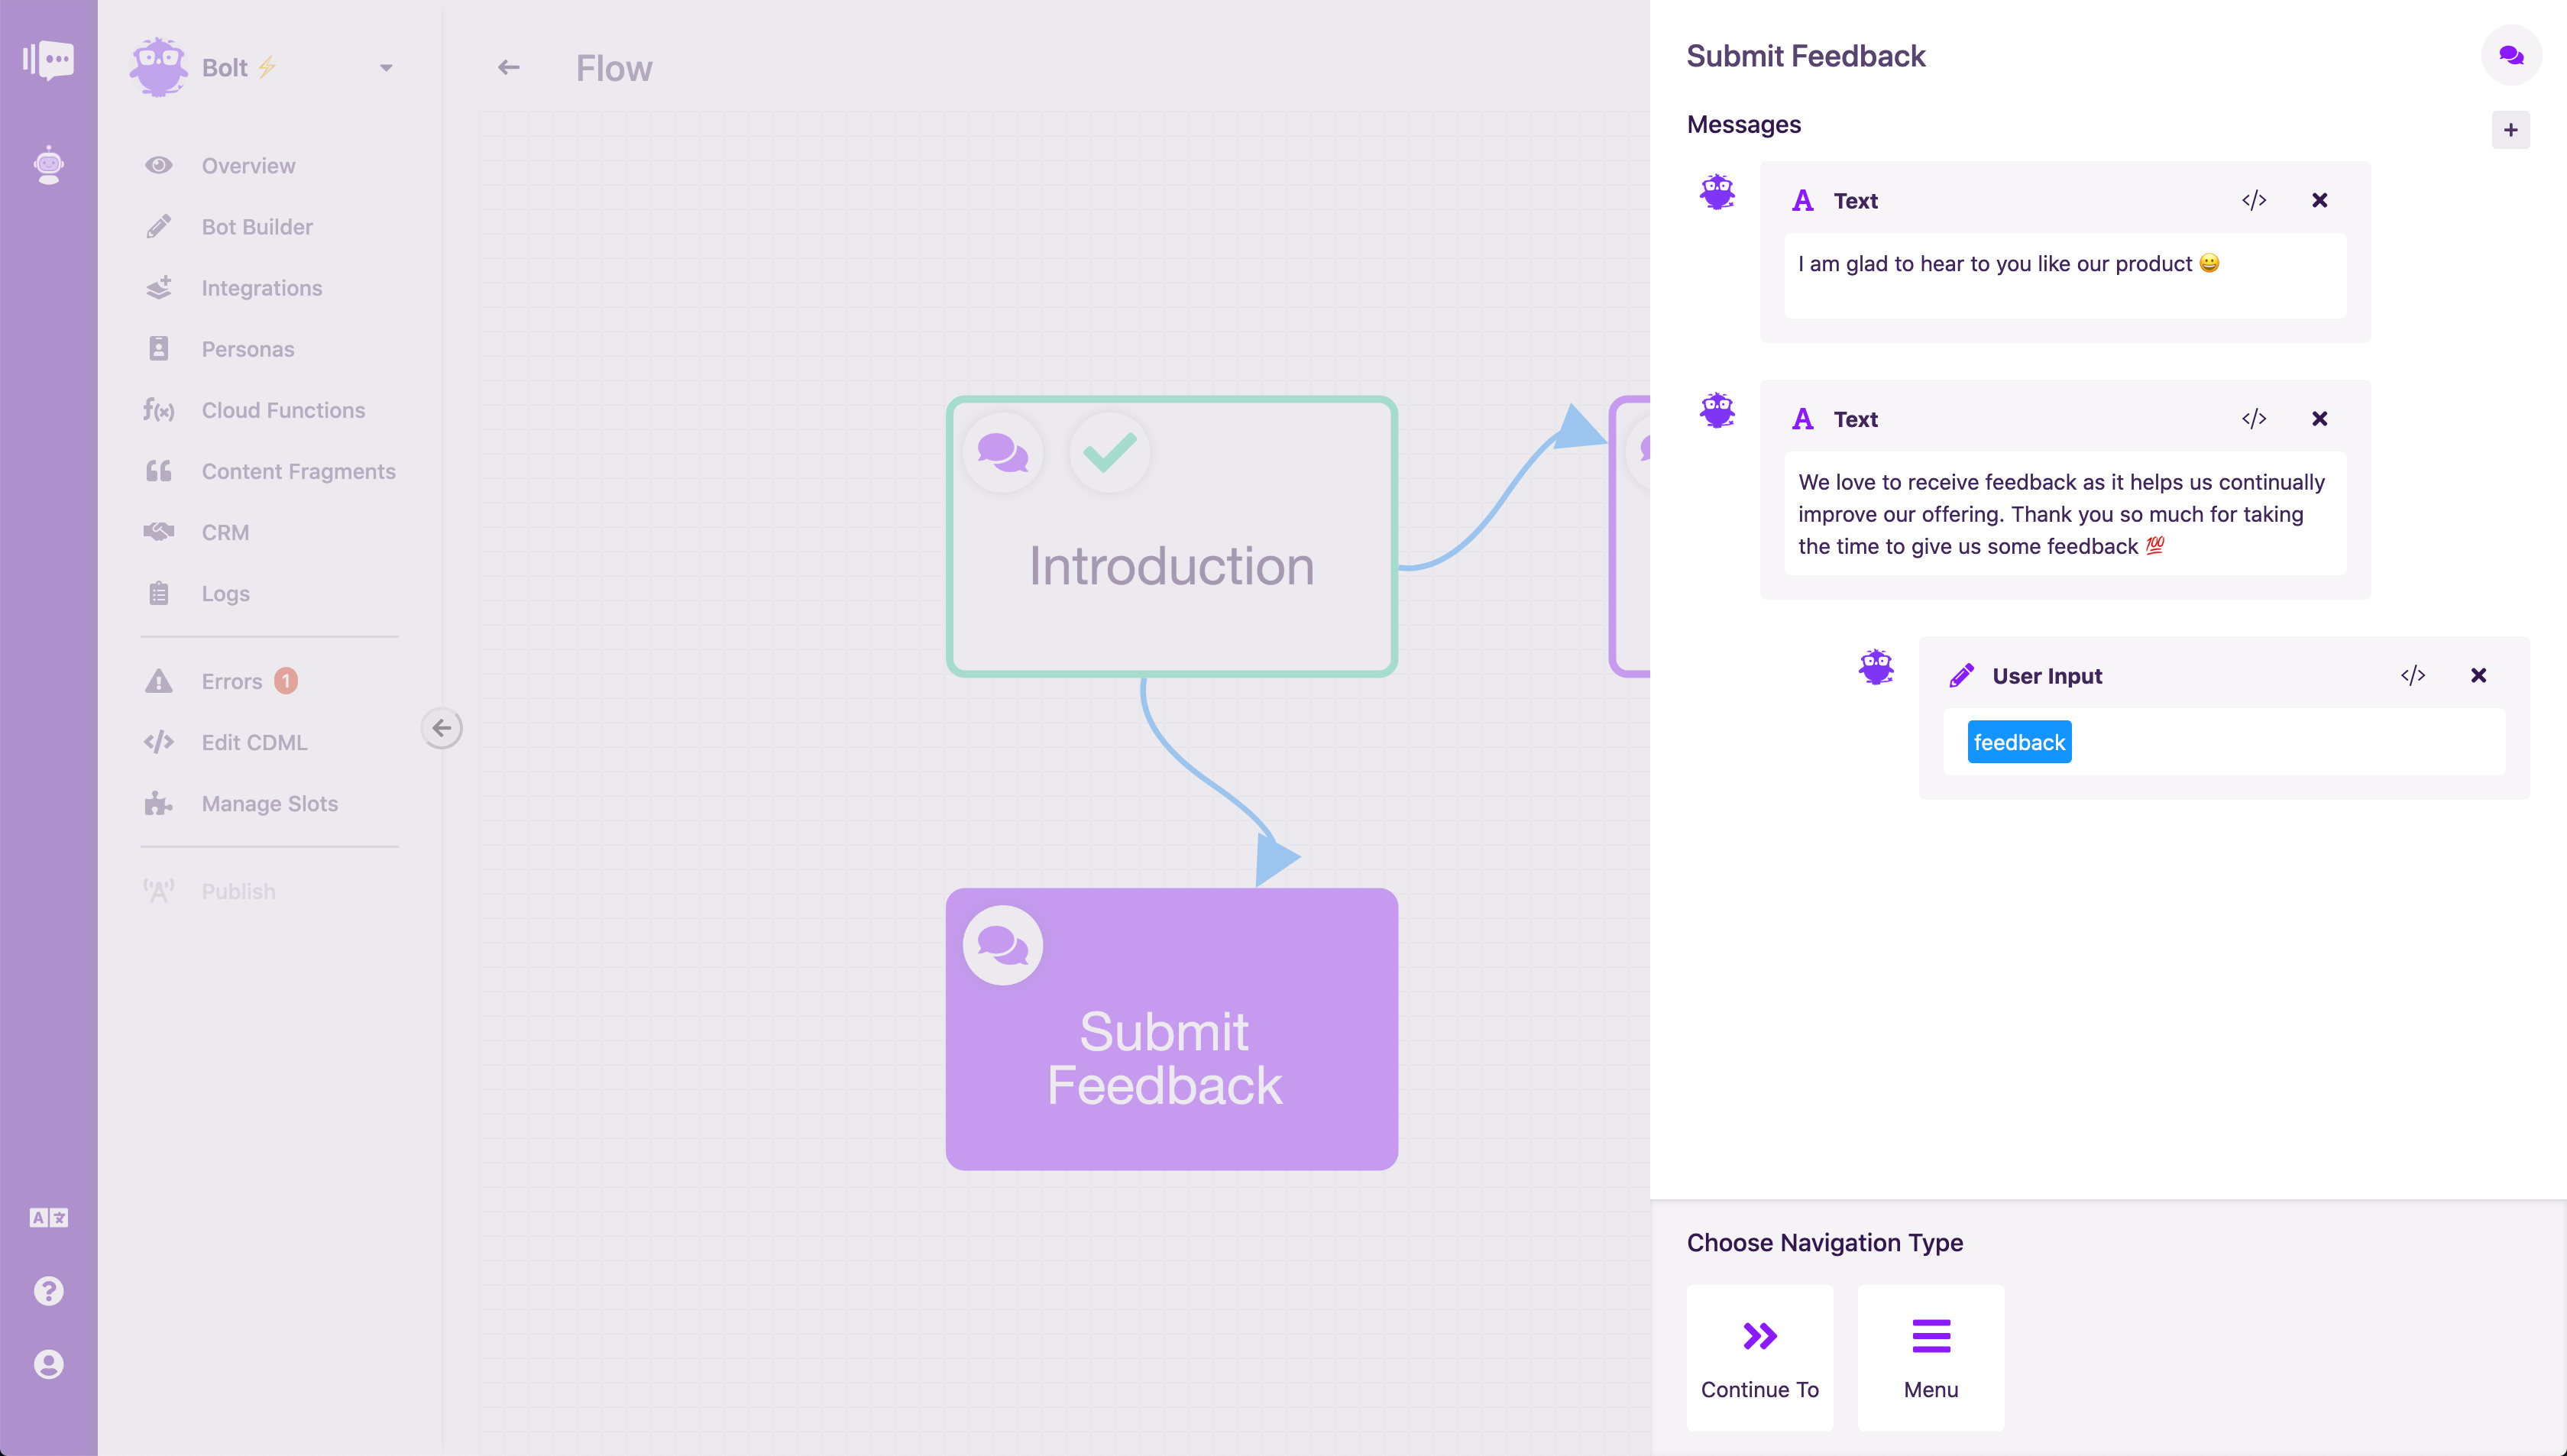 Building Bolt - Submit Feedback
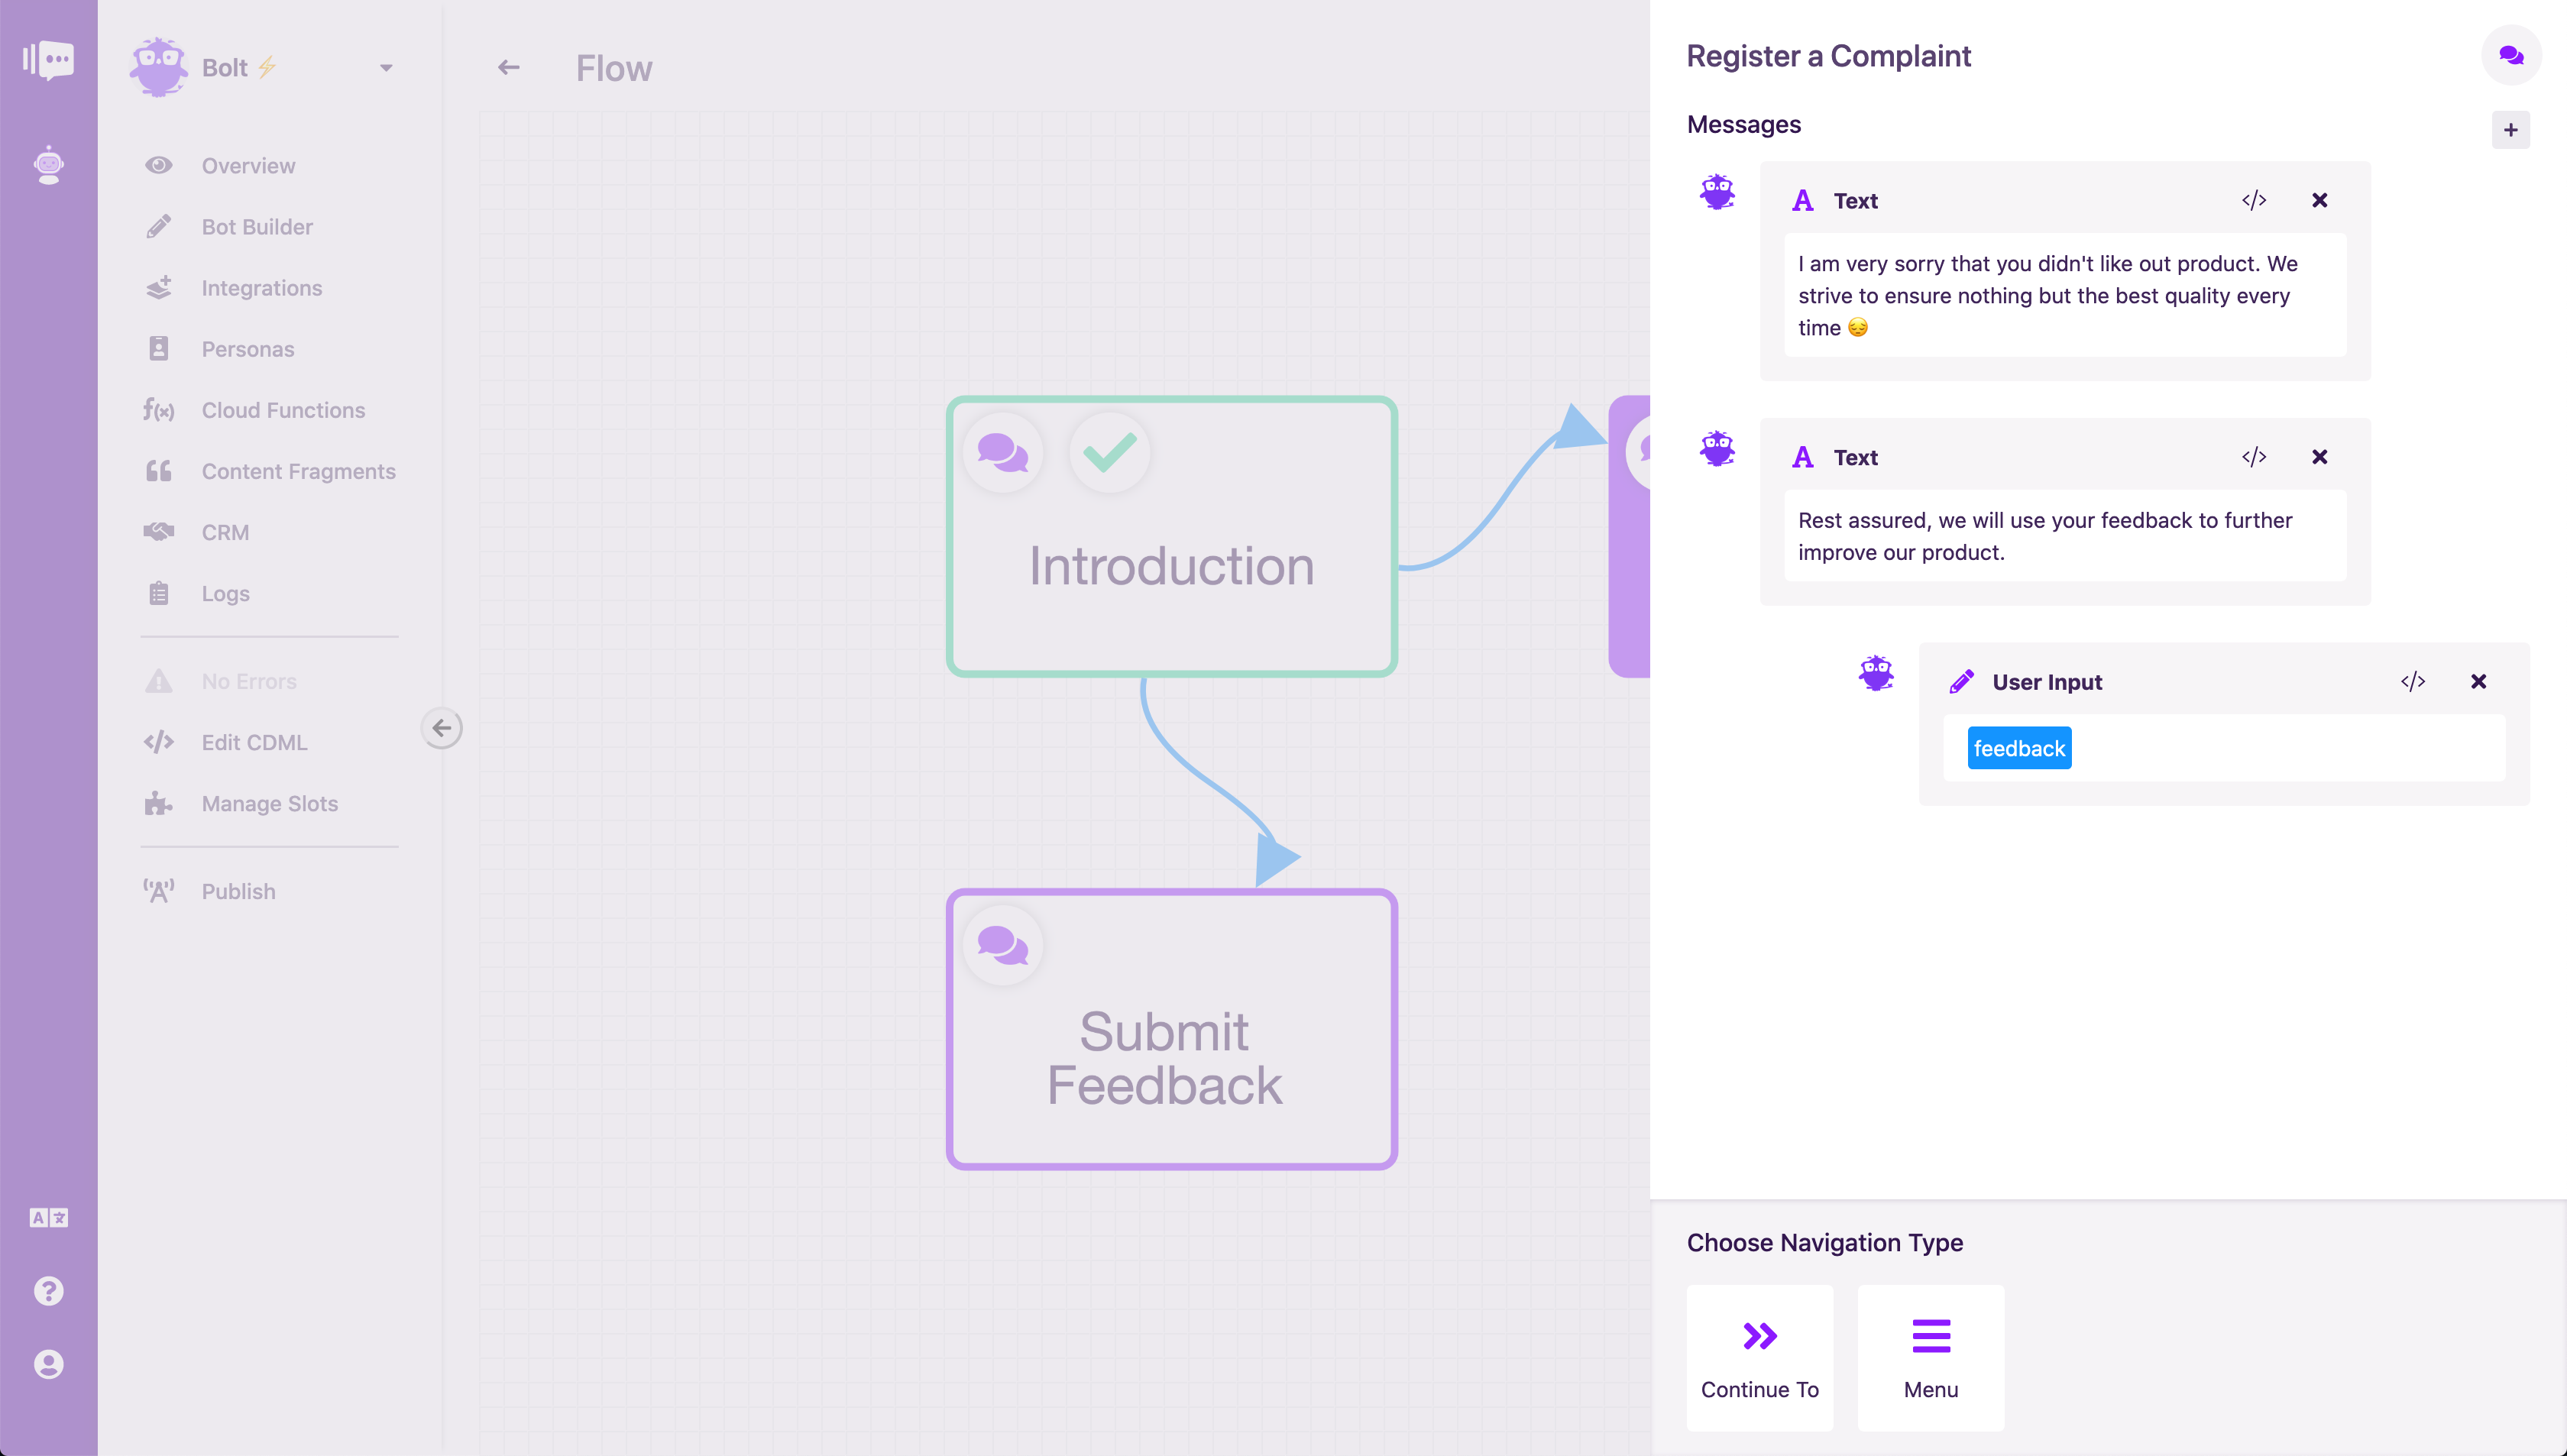 Building Bolt - Register a Complaint
Finally, let's add another element that the user can be direct to that say thanks for providing feedback and ends the conversation.
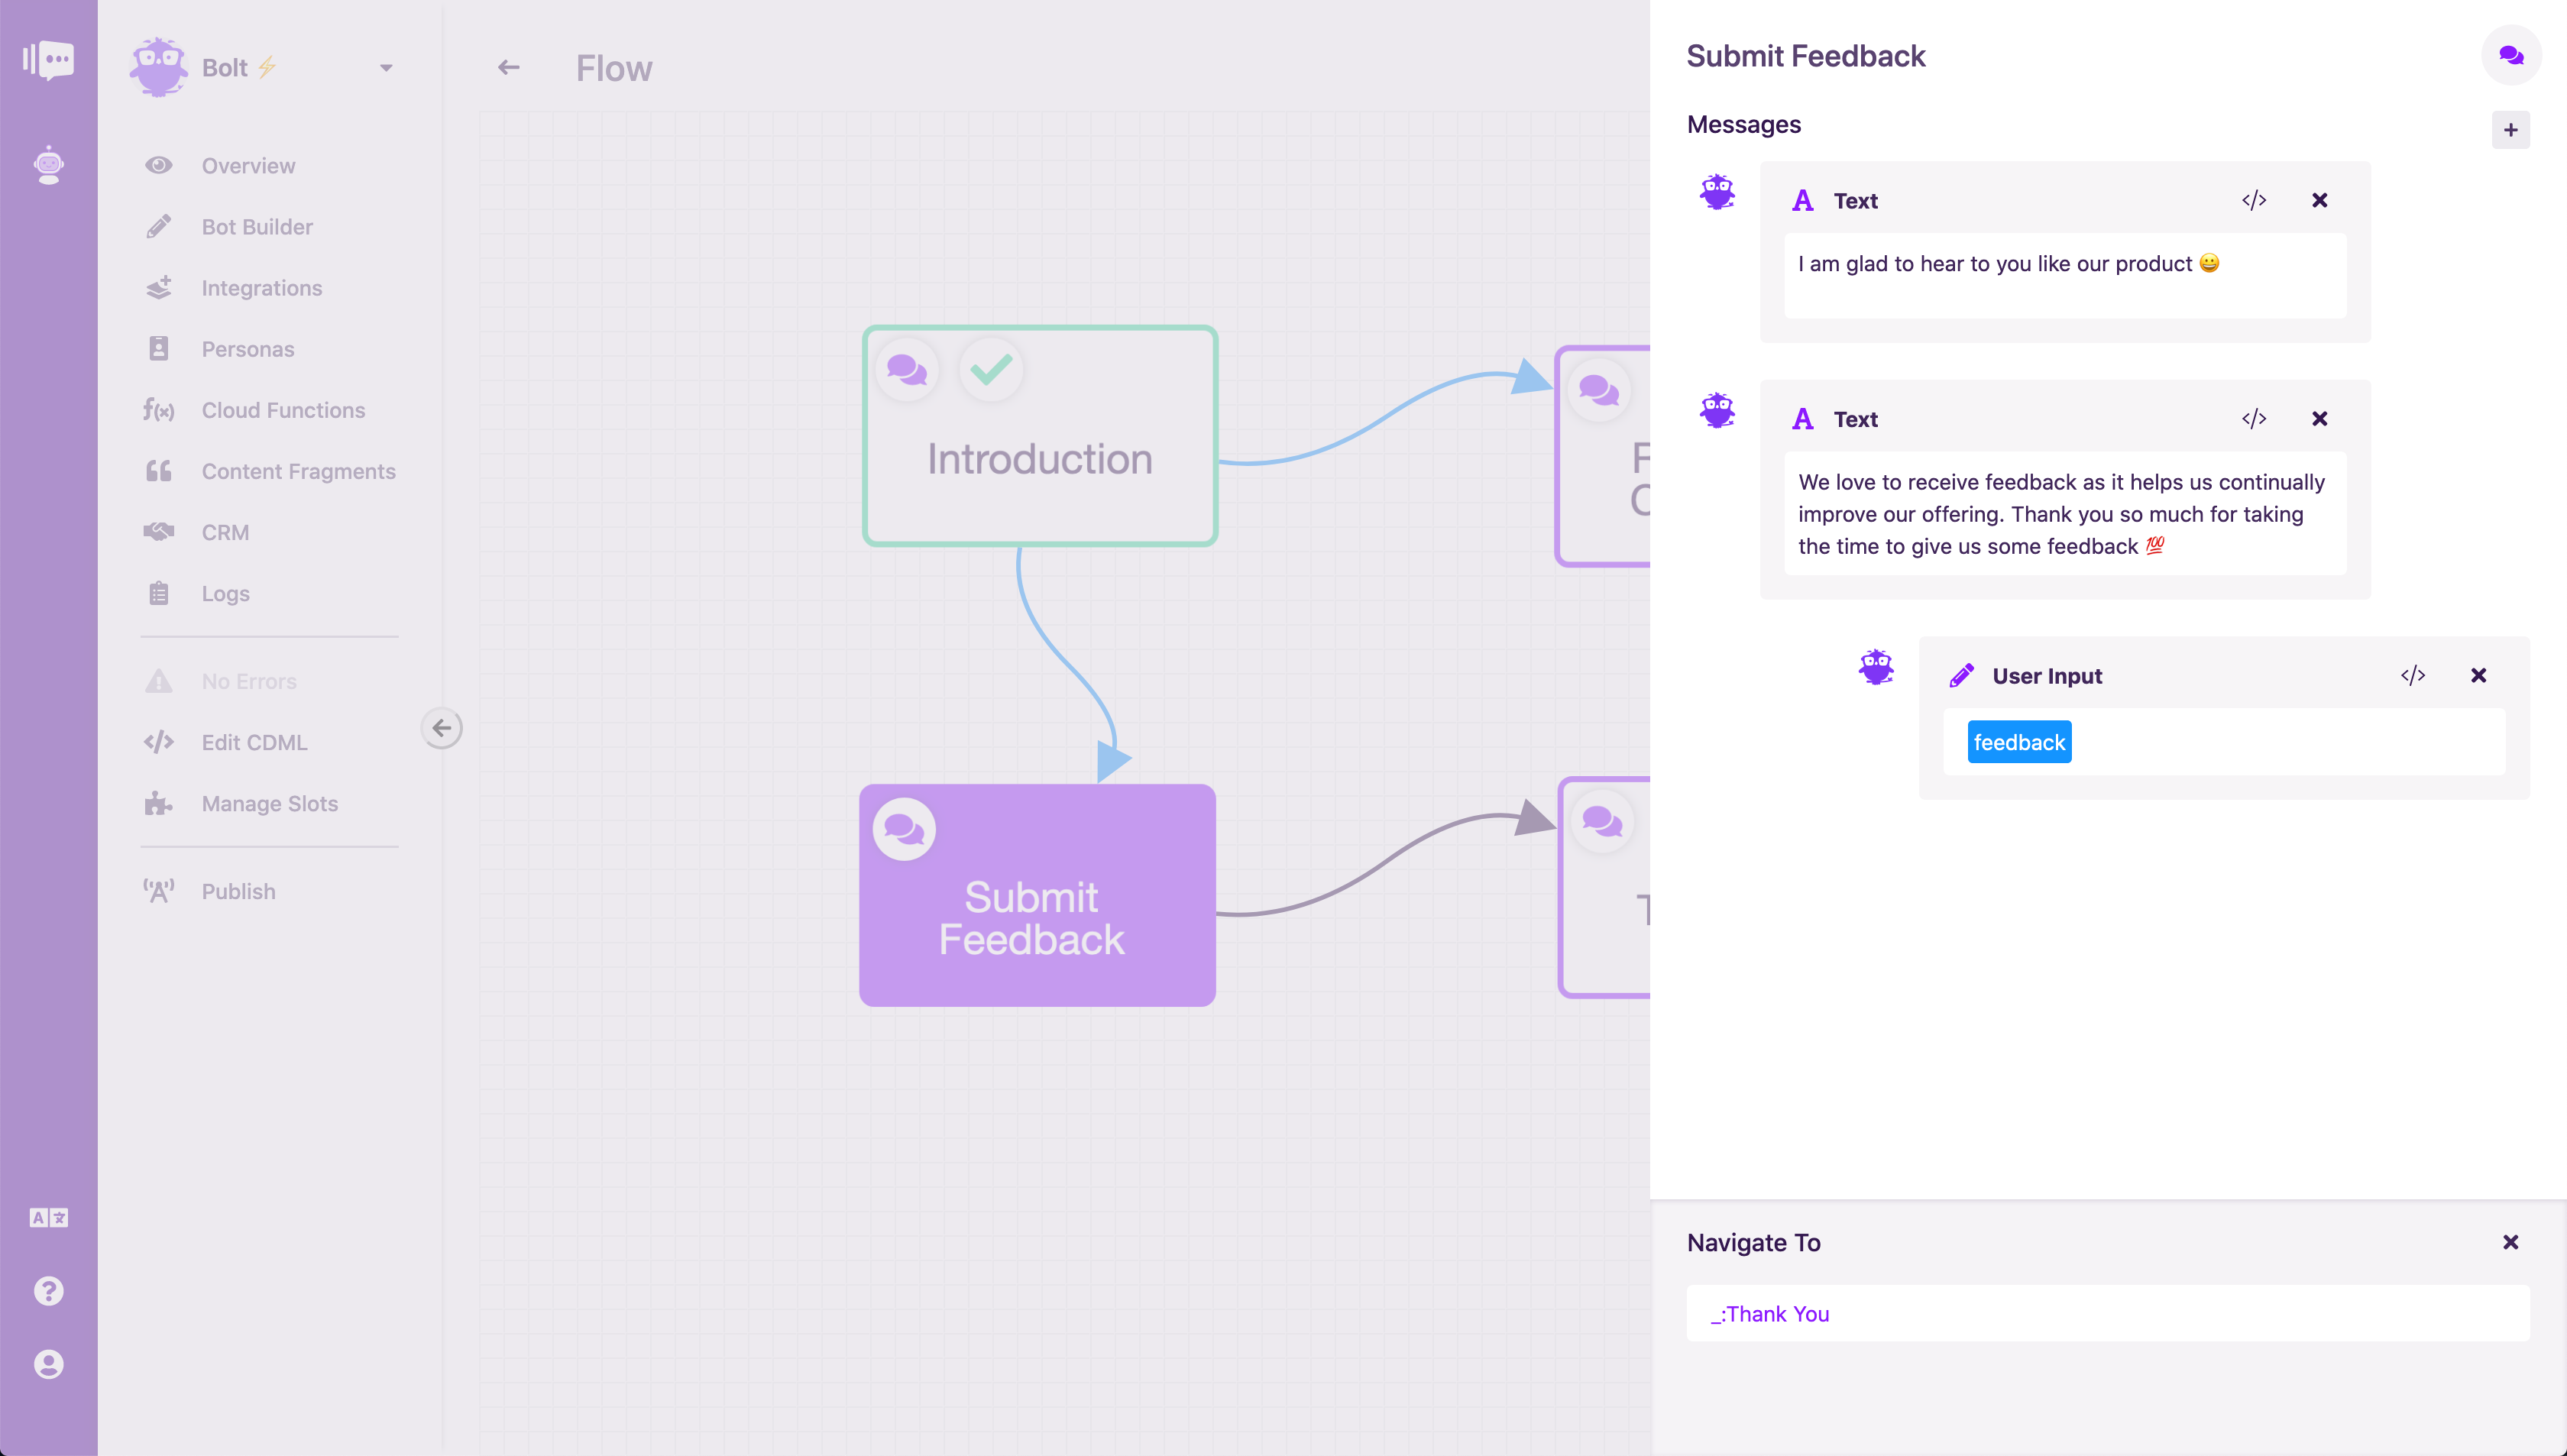 Building Bolt - Adding 'Continue To' to Submit Feedback
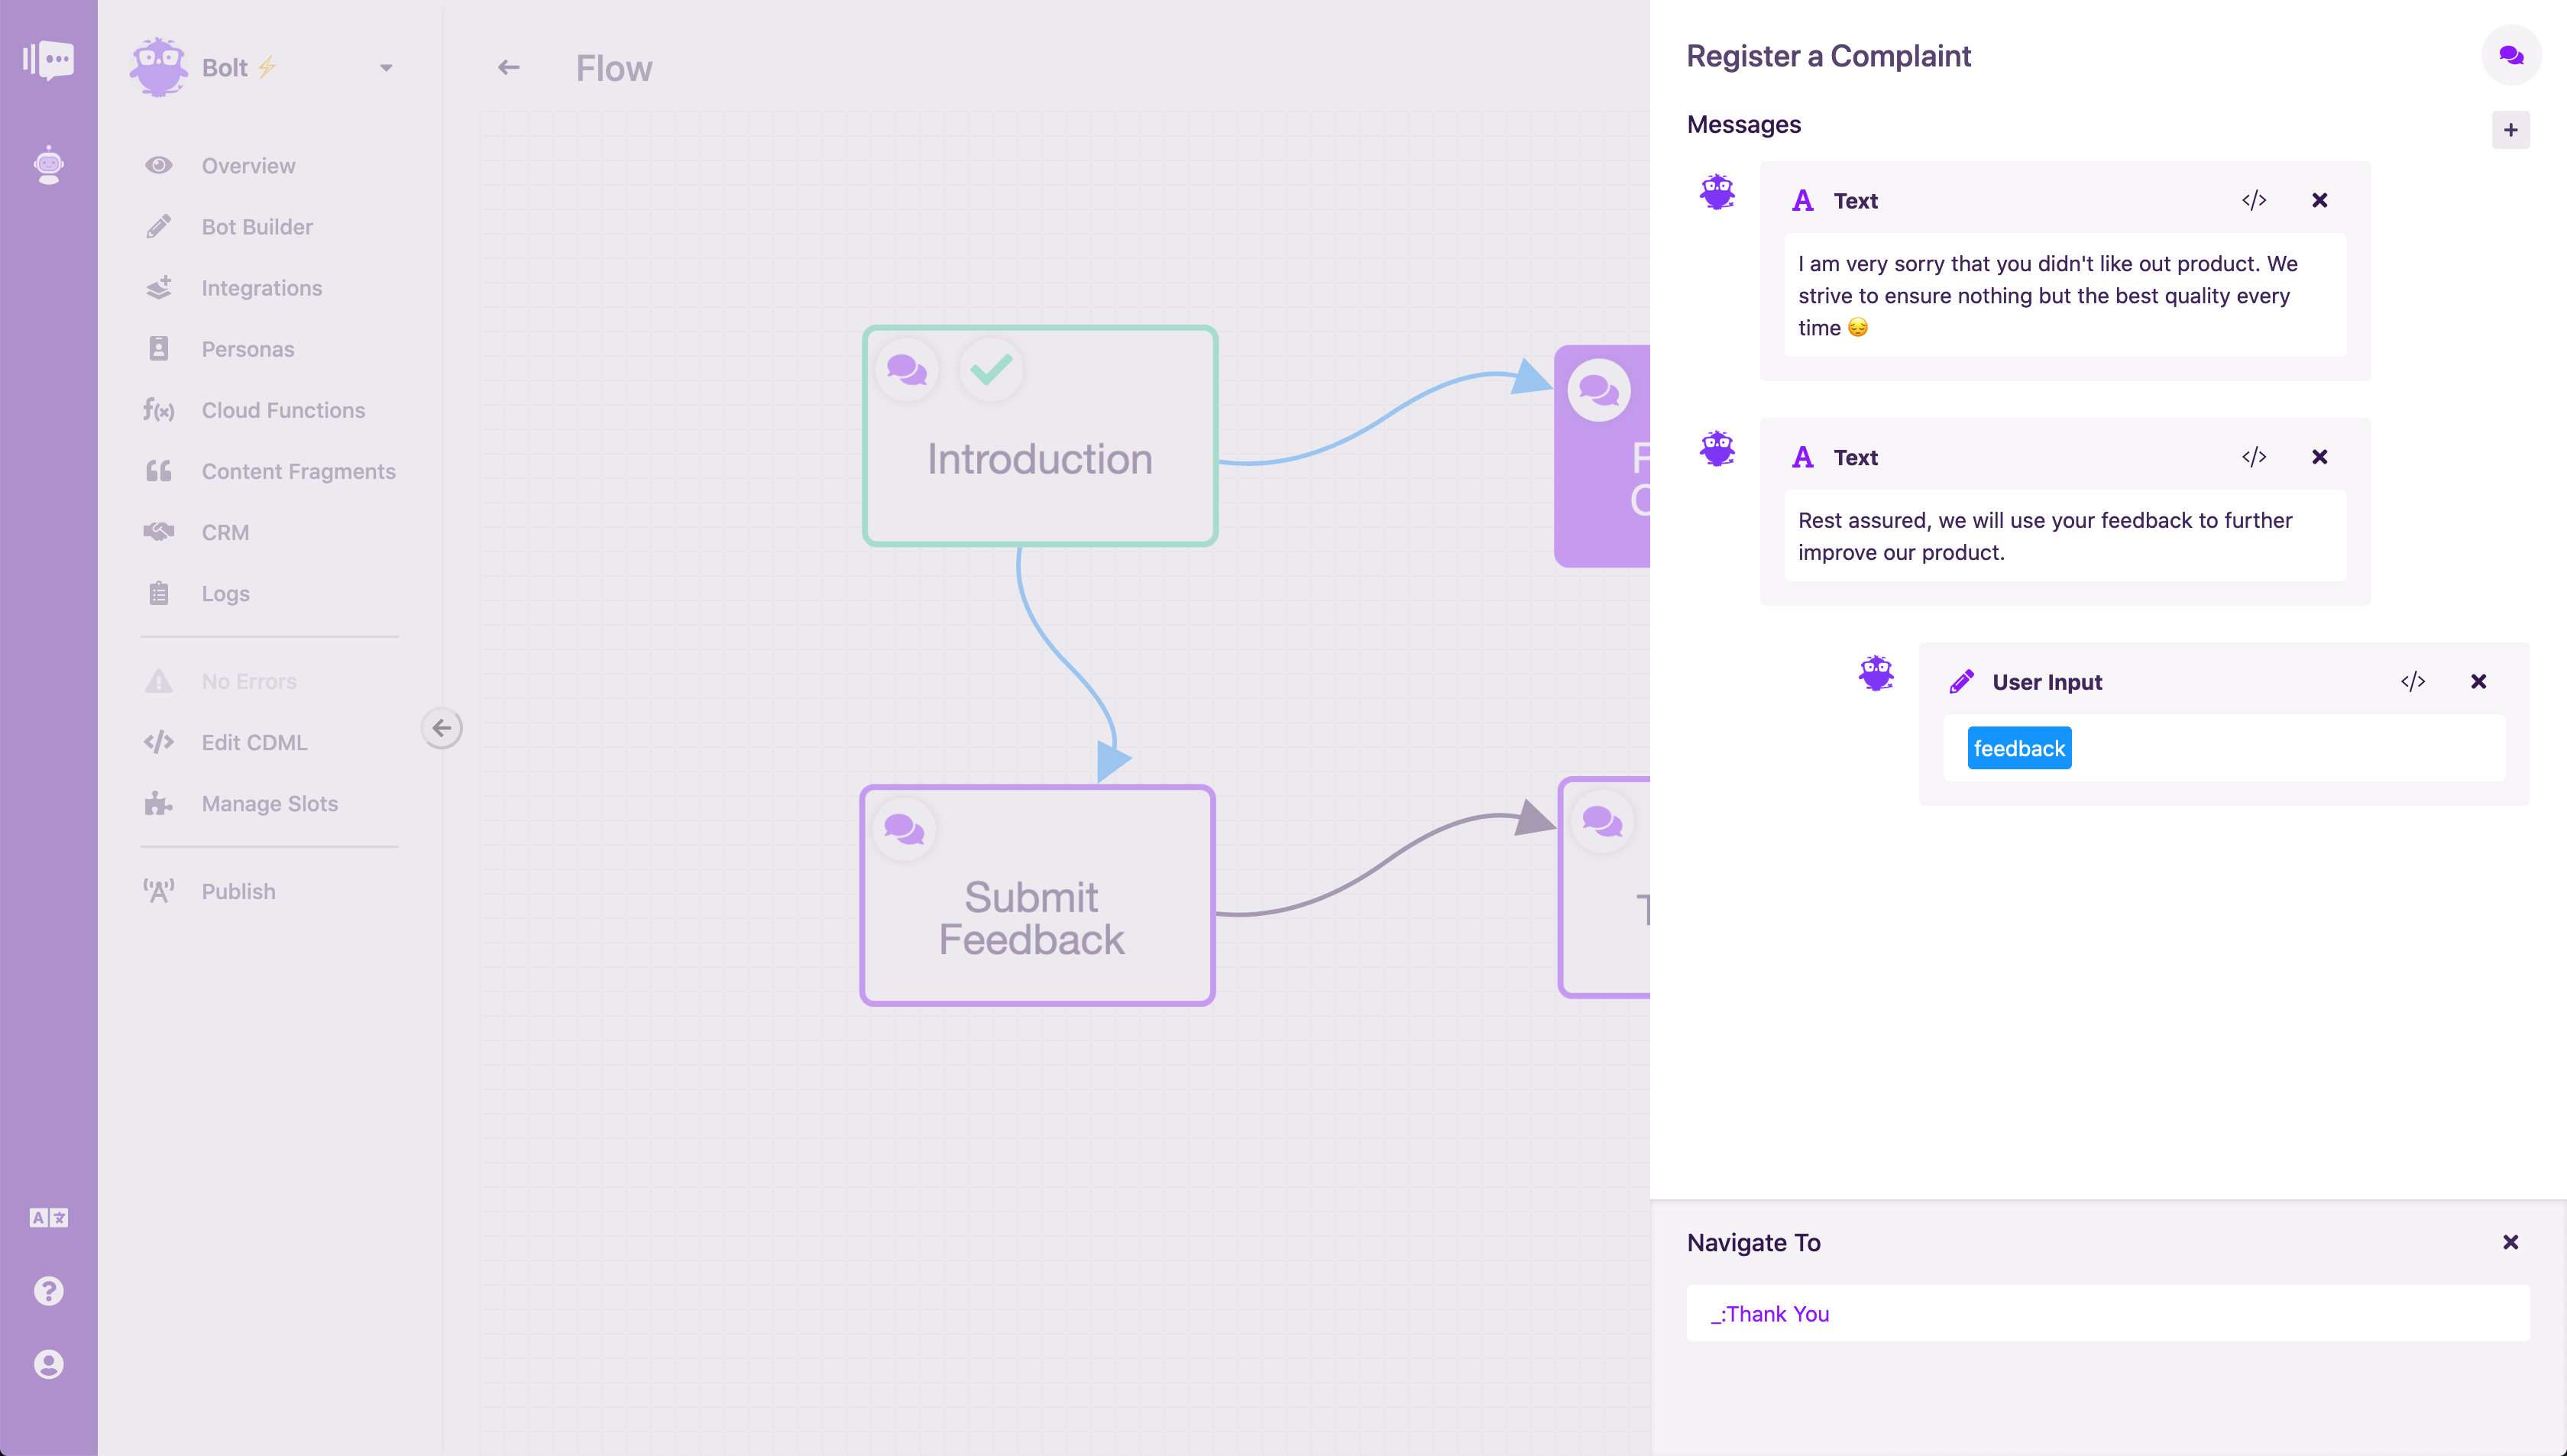 Building Bolt - Adding 'Continue To' to Register Complaint
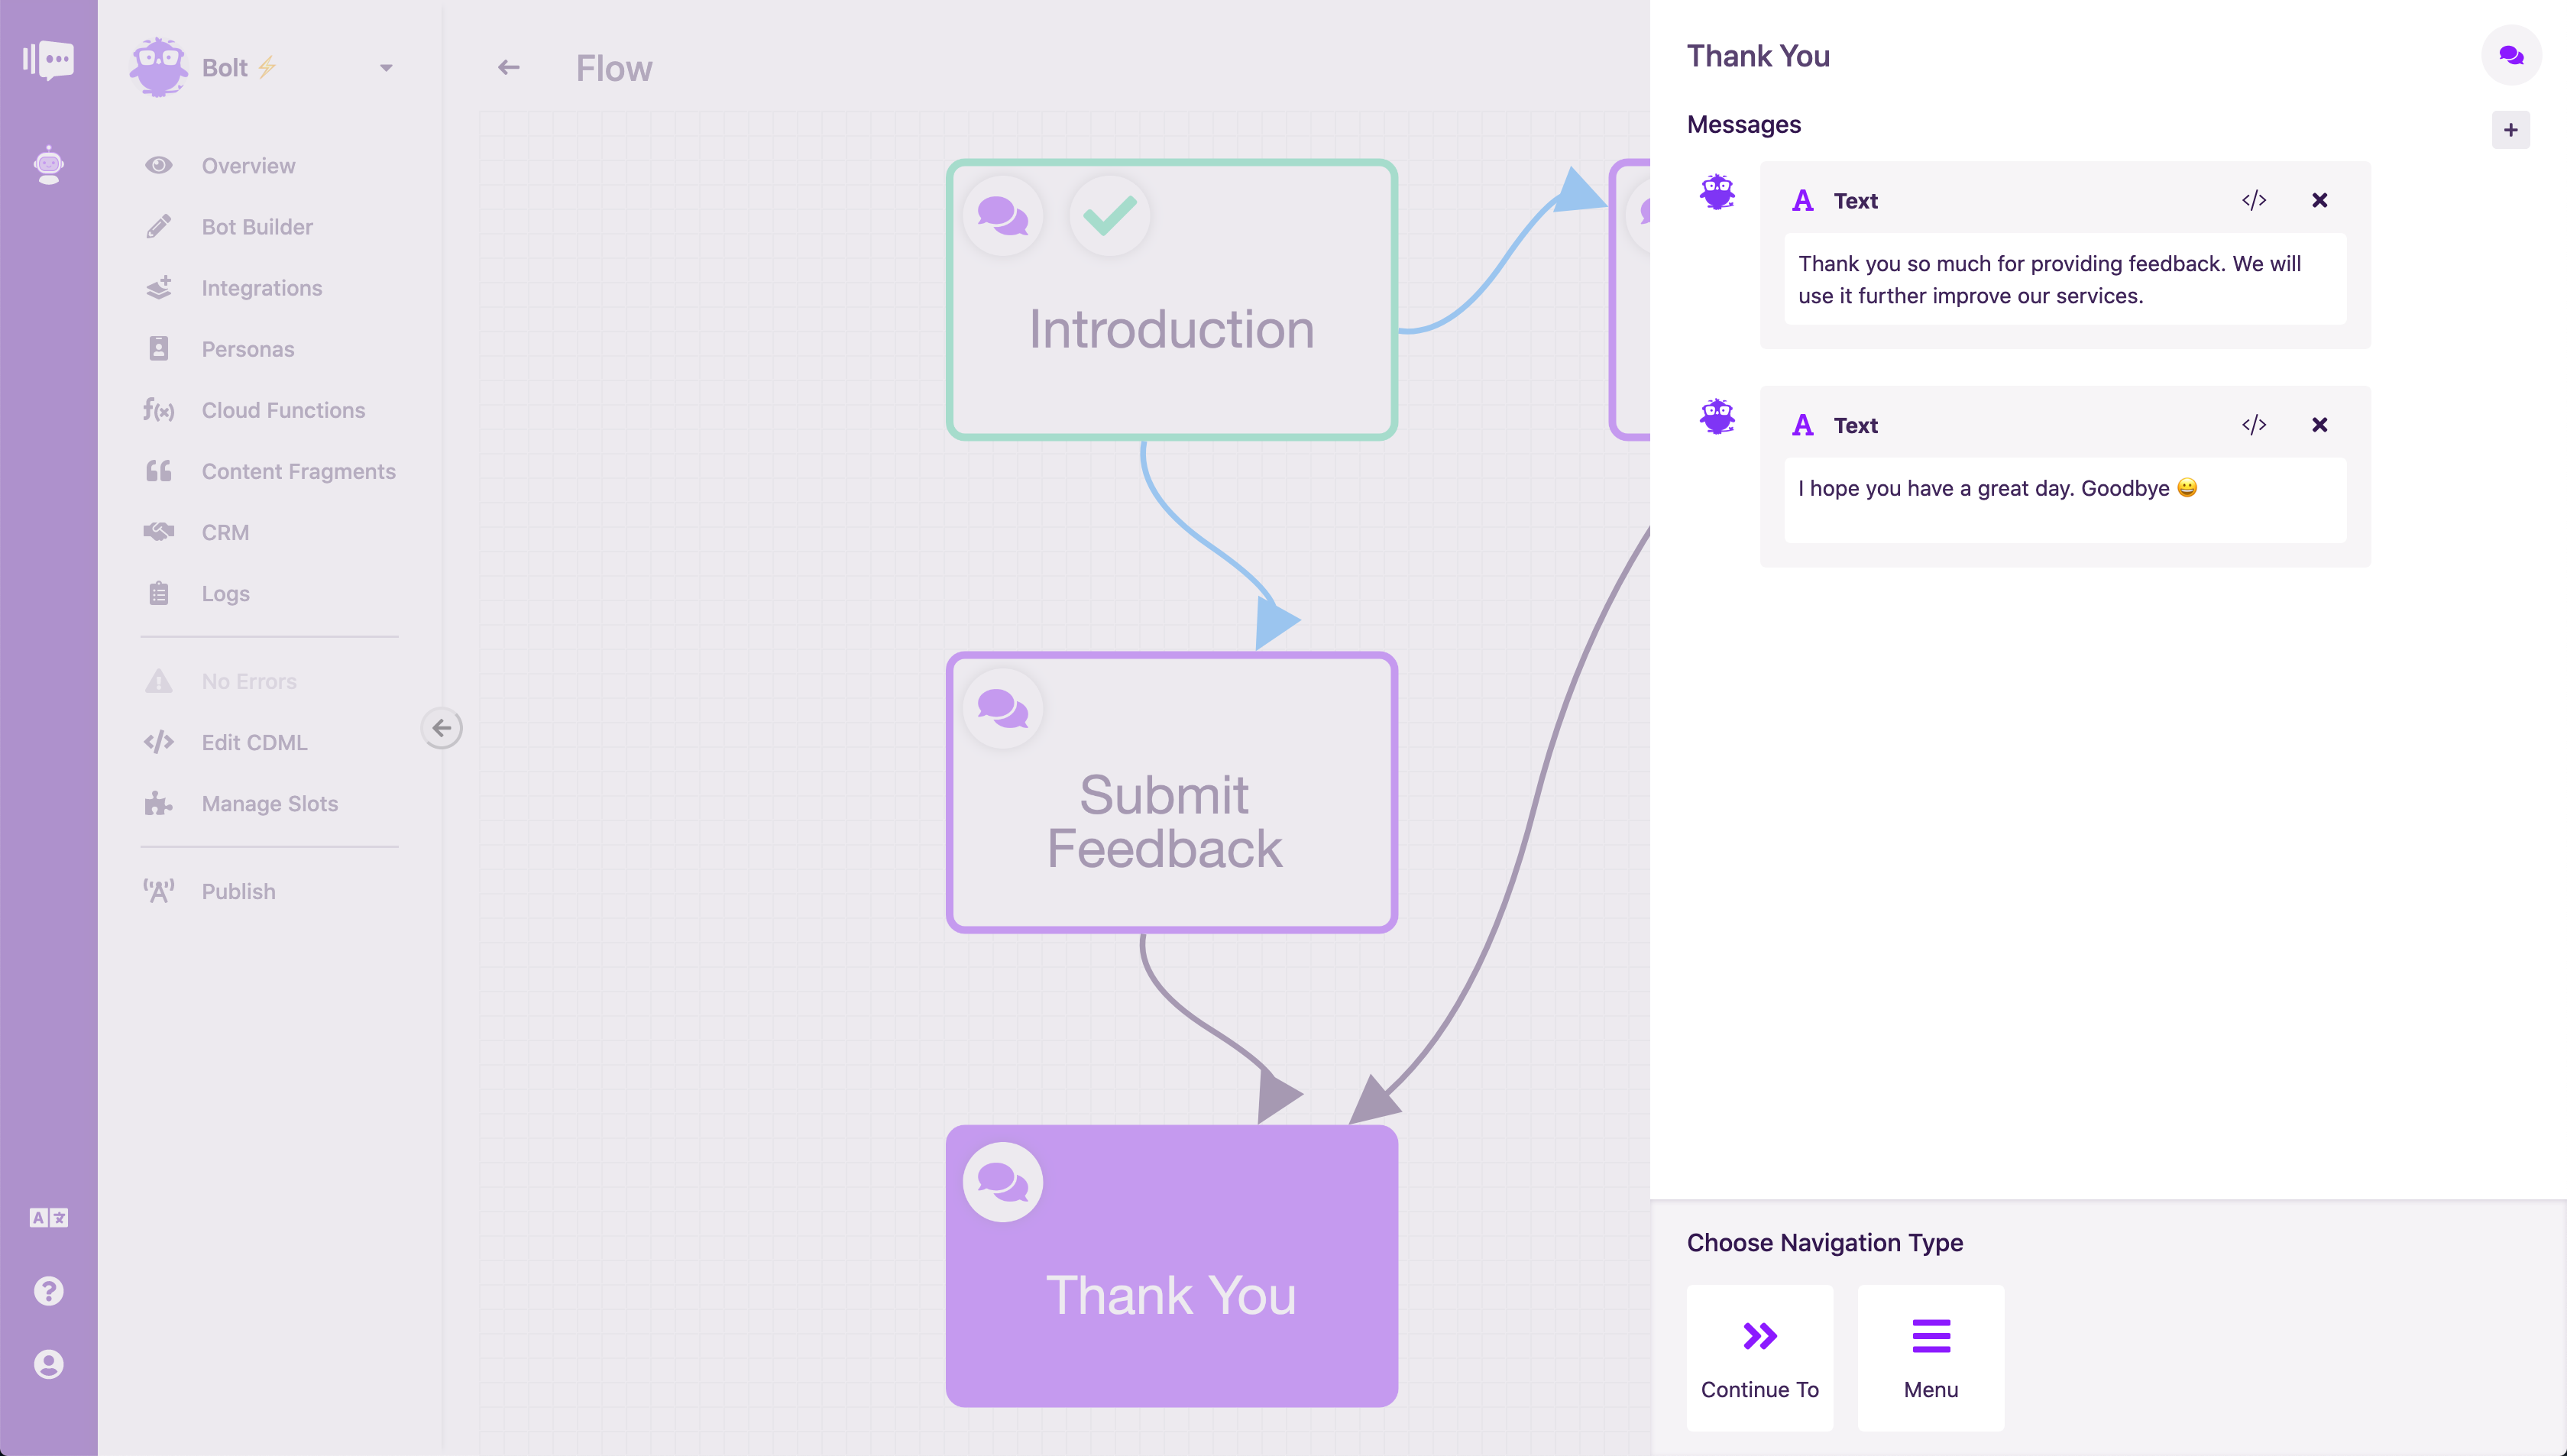 Building Bolt - Thank You
After this, the chatbot’s conversational flow is ready.
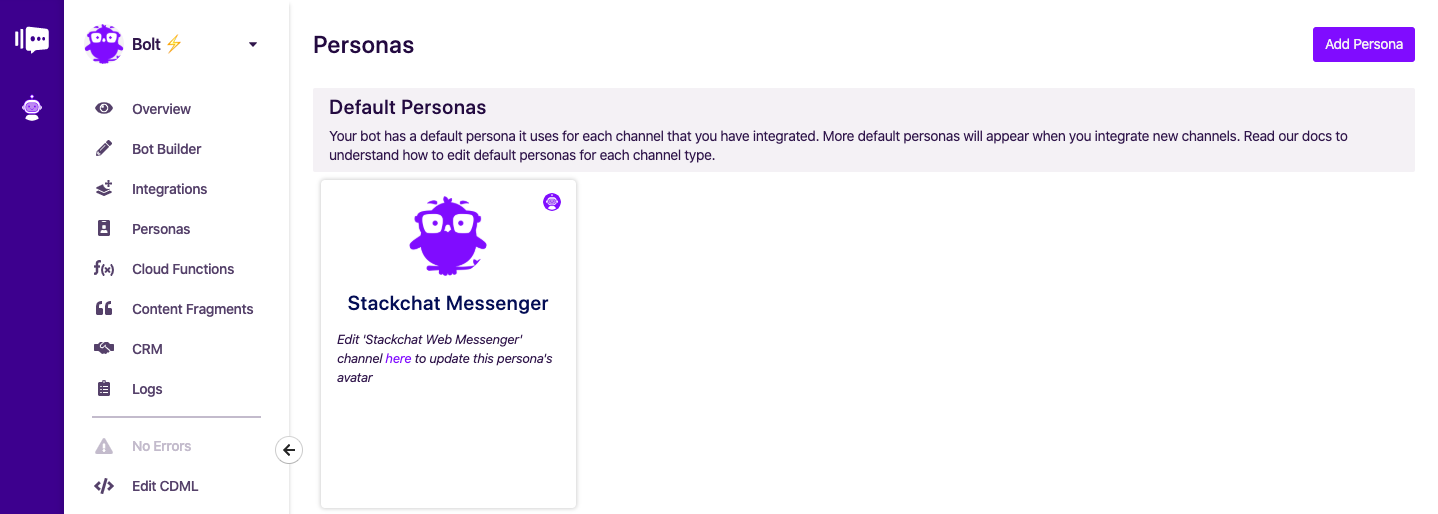
Now the next step is to add our persona. To do this, we add the persona in the Personas section. Then we assign that persona to a flow or a flow element.
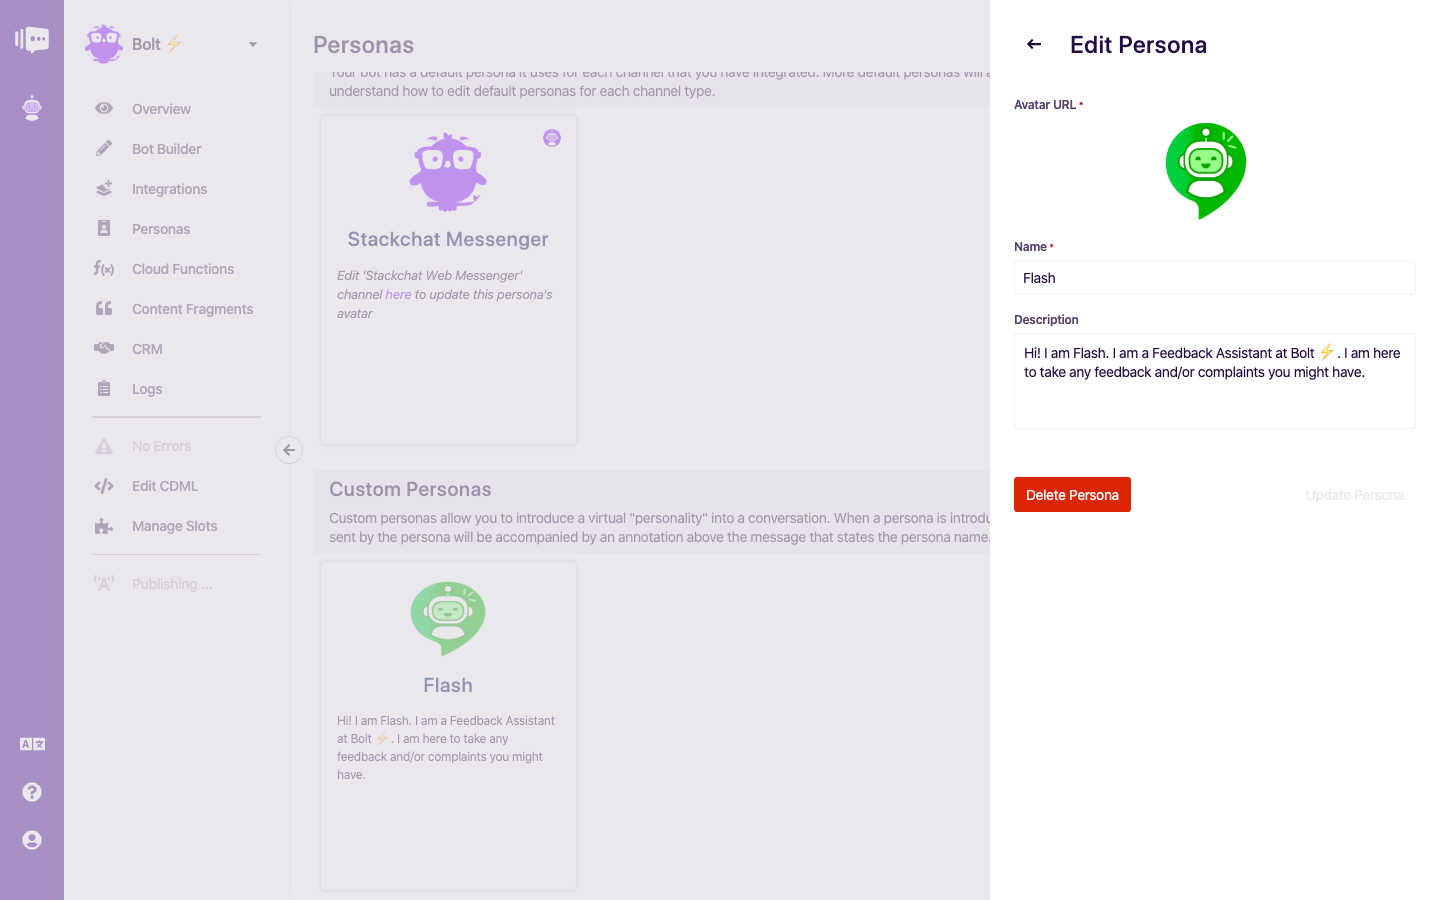 Building Bolt - Adding a new Persona
Once we’ve added the persona, we can use it throughout the bot. In our case, we want all the messages to appear as if they are coming from Flash.
So, let’s go back to the Bot Builder section and choose a persona for the Flow we have. We do this by clicking on the defult owl avatar.
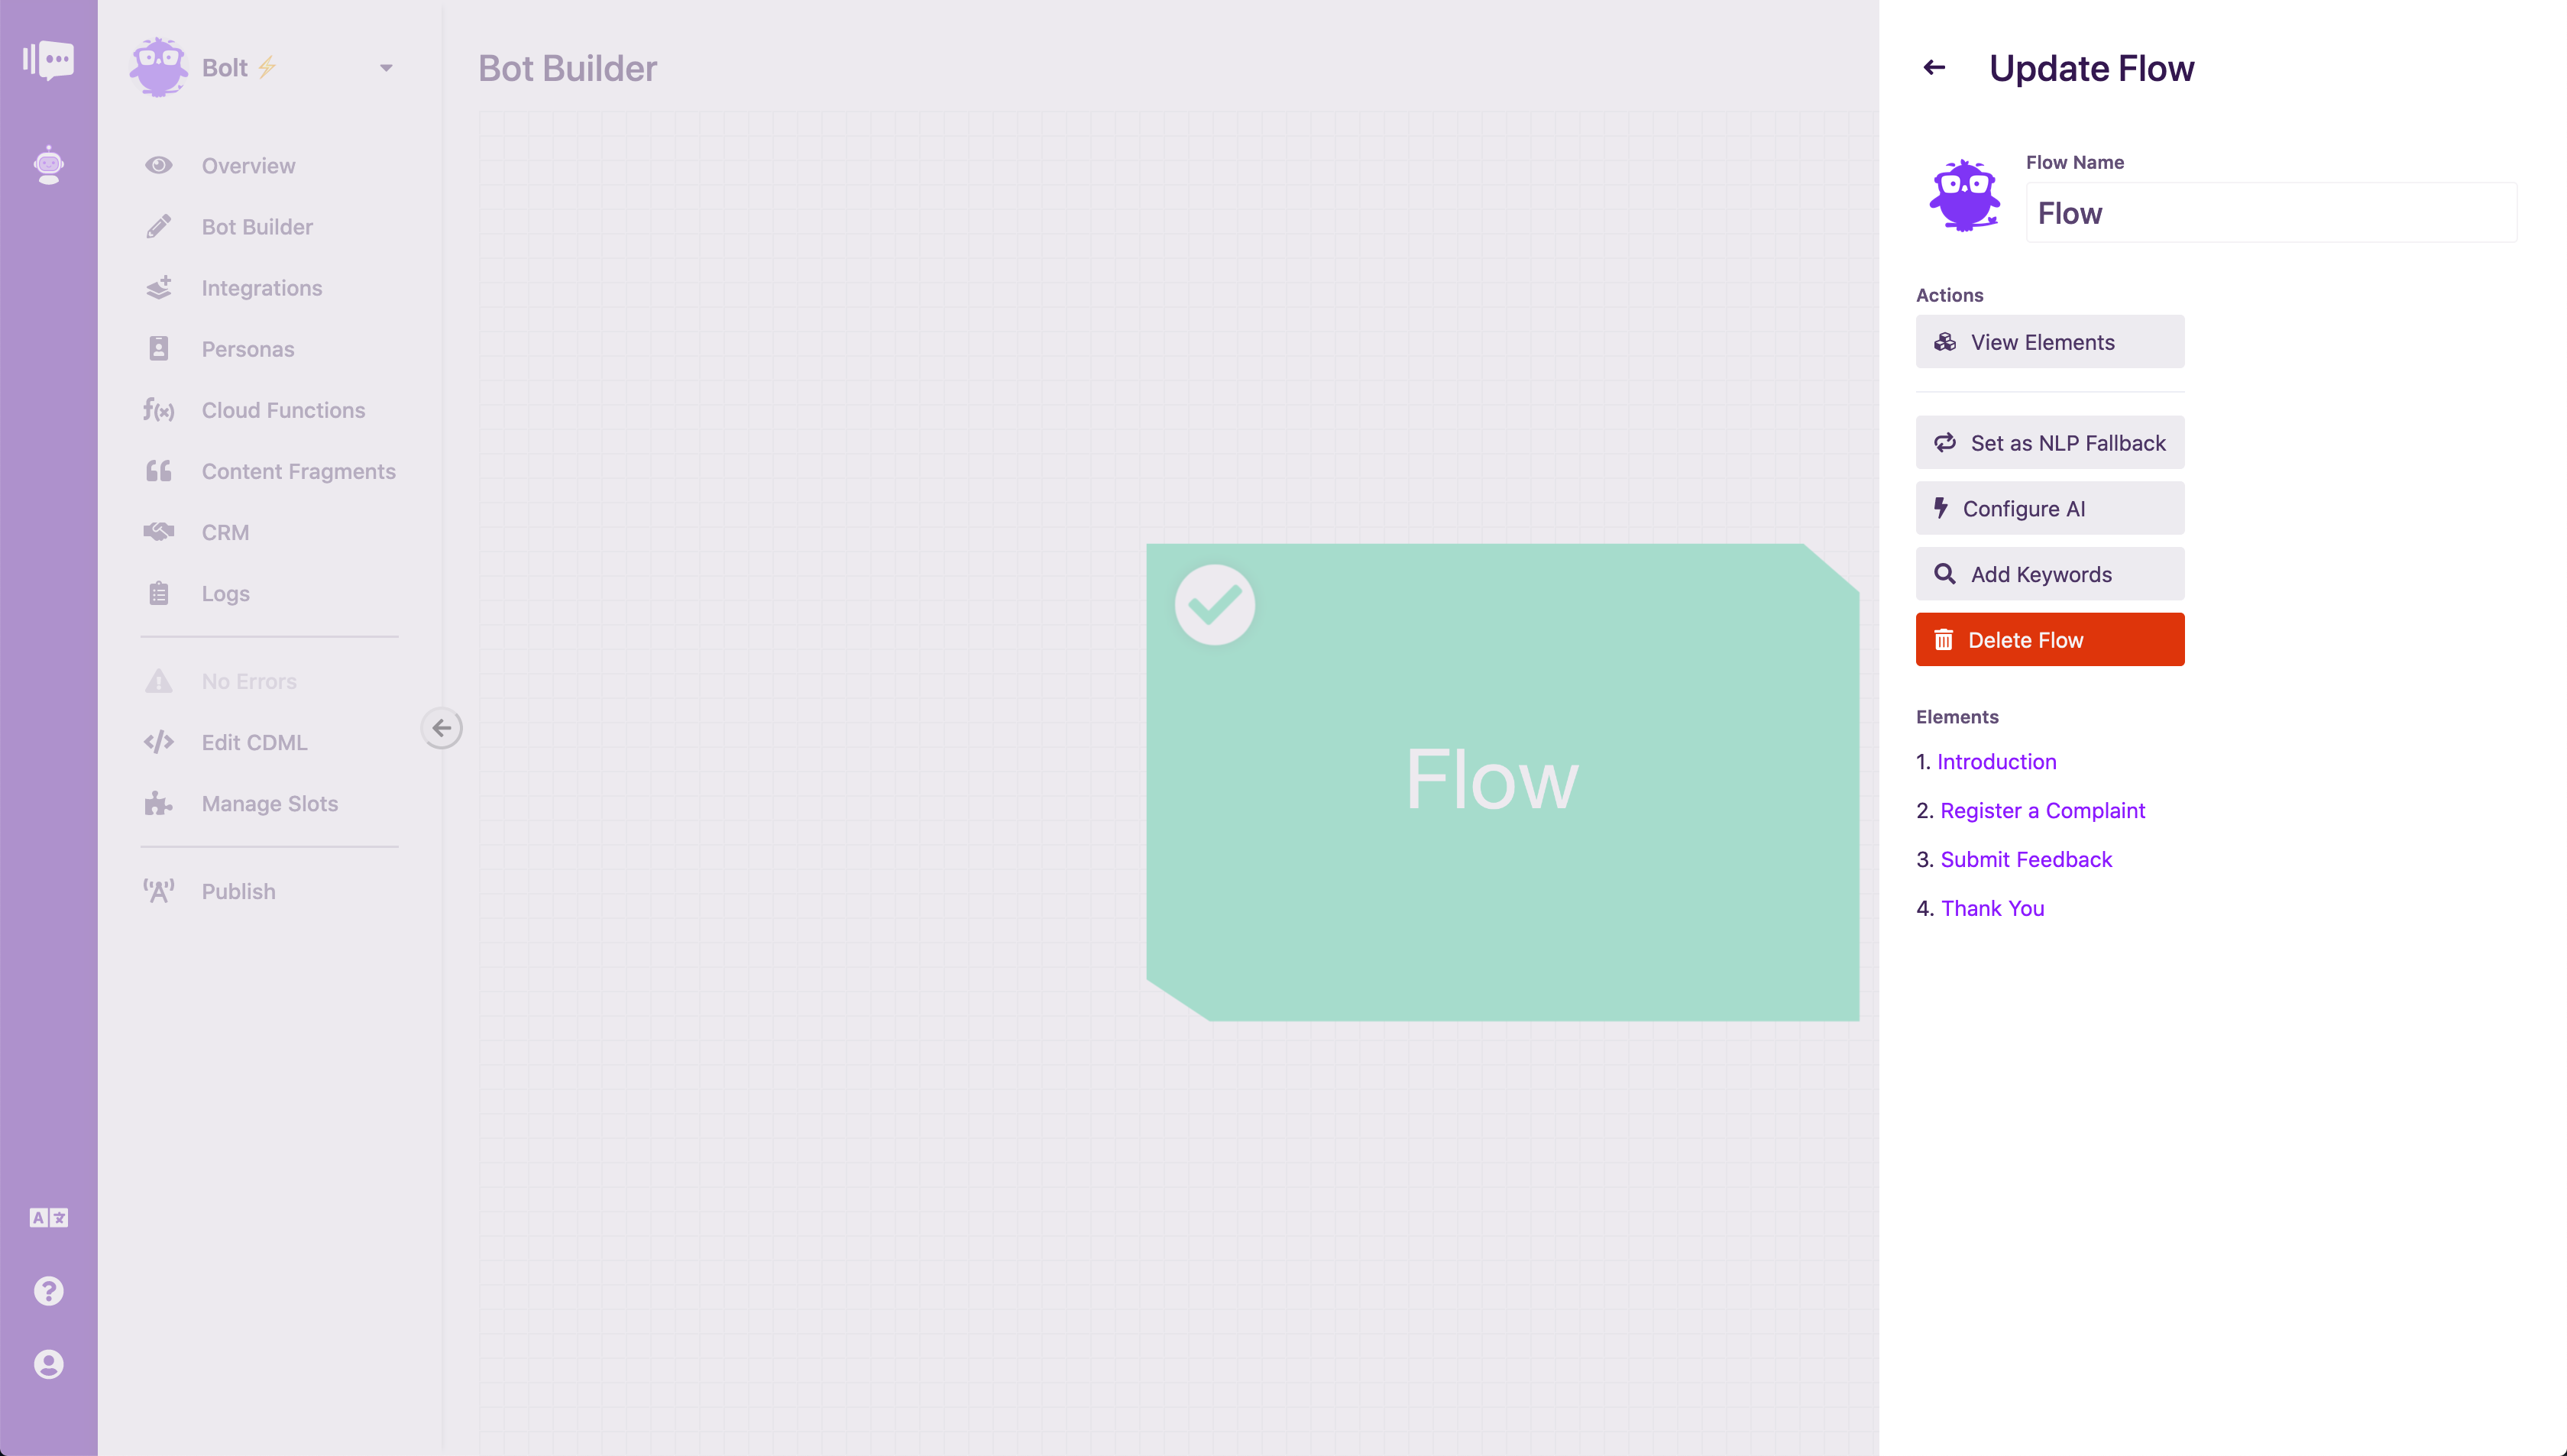 Building Bolt - Flow Settings
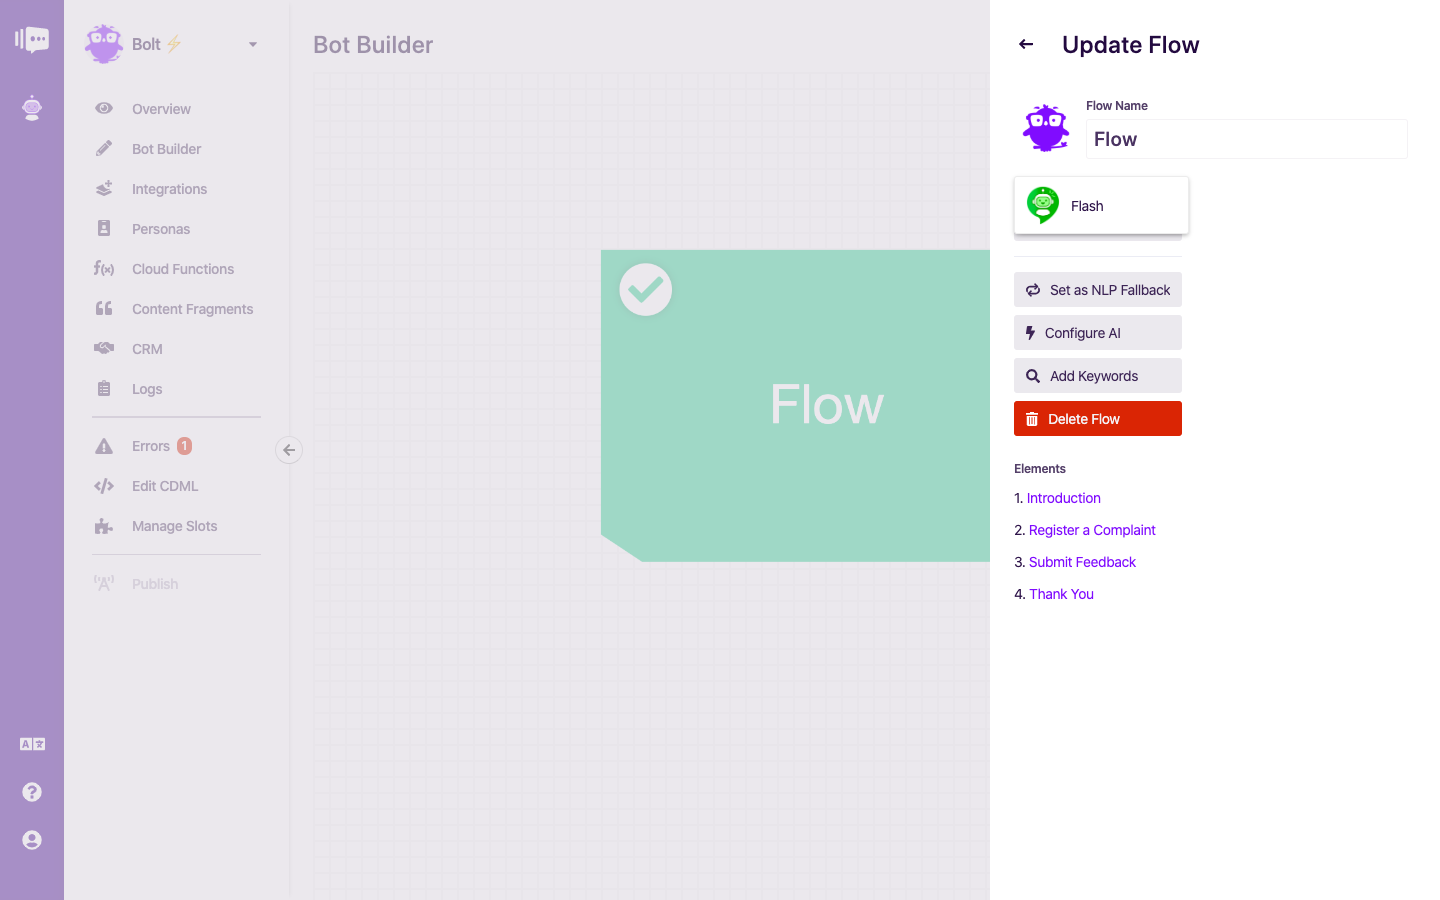 Building Bolt - Choosing a Persona for a flow
When we’re happy with this, we can now hit publish.
Once the publishing is completed, we can now test out the bot by chatting with it in the Web Messenger in the bottom corner of the right-hand side of the screen.
 Building Bolt - Messages from a persona
After the bot has been published once, the default Stackchat Web Messenger integration will show up in the Integrations section like shown below:
 Bolt - Integrations
If we click the Manage button, there will be a set of configuration options for the Web Messenger. In the Display section, we’ll find something called Default Avatar URL.
 Bolt - Customisation options for Stackchat Web Messenger
This option allows you to specify a default avatar/image that would be used wherever you embed the Web Messenger. However, this is NOT a replacement for the personas; rather a fail-safe for your chatbot in case it is not able to find the persona associated with a message.
Facebook Messenger
One of the 3rd party channels we support is integration with Facebook Messenger. Stackchat Studio allows you to deploy your chatbot to your Facebook page so that your users can contact you easily. Facebook Messenger also supports personas, like Stackchat Web Messenger.
To add personas to your Facebook page, you'll first need to add the Facebook Messenger integration. Once you have added the integration, you will need to re-publish the bot again so that all of your personas will work for conversations in Facebook Messenger as well.
So, there we have it! We have a bot and we’ve successfully added a persona to it as well. As a plus, if Bolt decides to expand its business strategy to include more chatbots in the future, it’s an easy return to Stackchat Studio to add various personas.
If you’d like to futher read about why adding a personality to your chatbot is important, you can check out our previous post here.